The bot automatically saves the user’s answer so you can use saved data in an ongoing conversation. When you bring the information saved as an attribute to the bot flow but do not need to ask for it, the Set attribute action comes in handy. This action allows you to save, use, and modify an attribute if needed.
Attributes let you collect common data such as a user’s name or email. Using default attributes, you can also gather more advanced information, including your user’s location or country. The easiest way to collect the information is to use the Question action. When you do not need to ask for the information, use the Set attribute action.
The Set attribute consists of two elements:
-
SET - choose the attribute’s name,
-
TO - provide value to the attribute.
To use the action, drag the block from the Actions and Interactions menu and add it to your bot flow.
 After you add the action to your bot flow, enter the attribute’s name and value.
After the chat, all of the attributes are available in the Archives. You can check them there and analyze the chat information.
How to use Set attribute with default attributes
When the user provides the correct keywords, your chatbot recognizes the phrases and correctly sets the attribute’s value. The chatbot chooses the path based on the Confidence score.
In this example, we will set the chat language to English or Spanish based on the welcome message sent by the user. This article provides a full tutorial on how to make your bot multilingual.
-
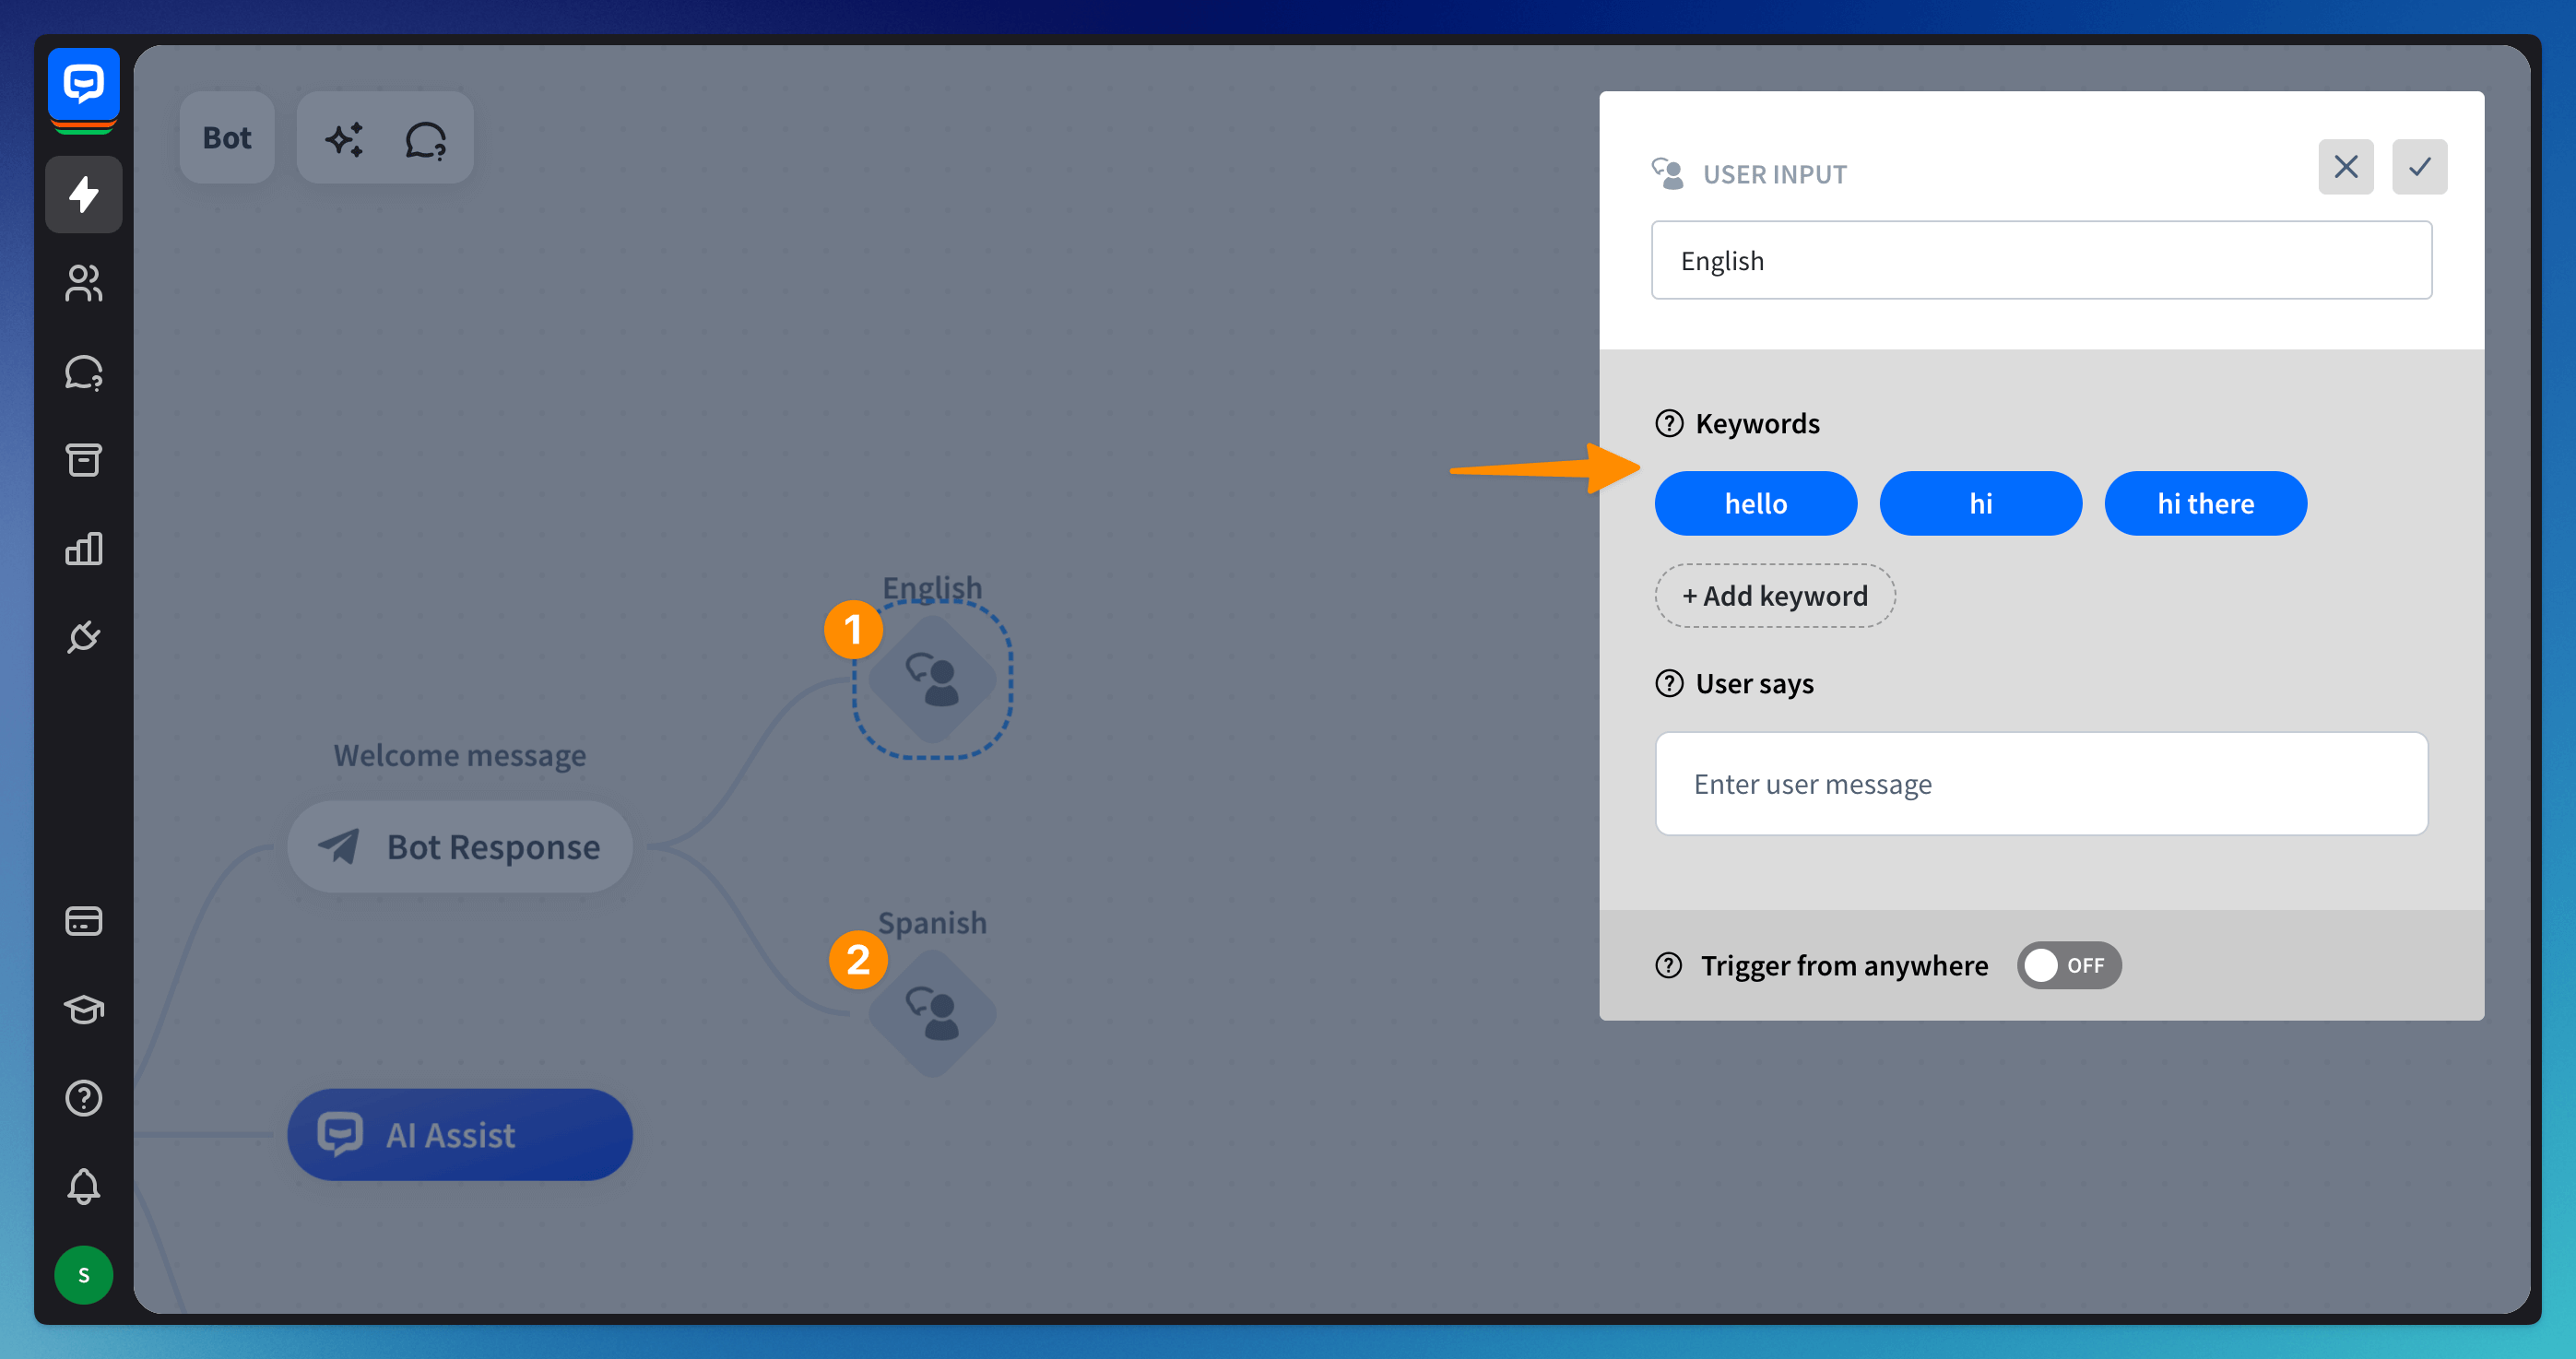
Add User input blocks after your bot flow. Click on the blocks and provide keywords:
- add phrases in English
- add phrases in Spanish

-
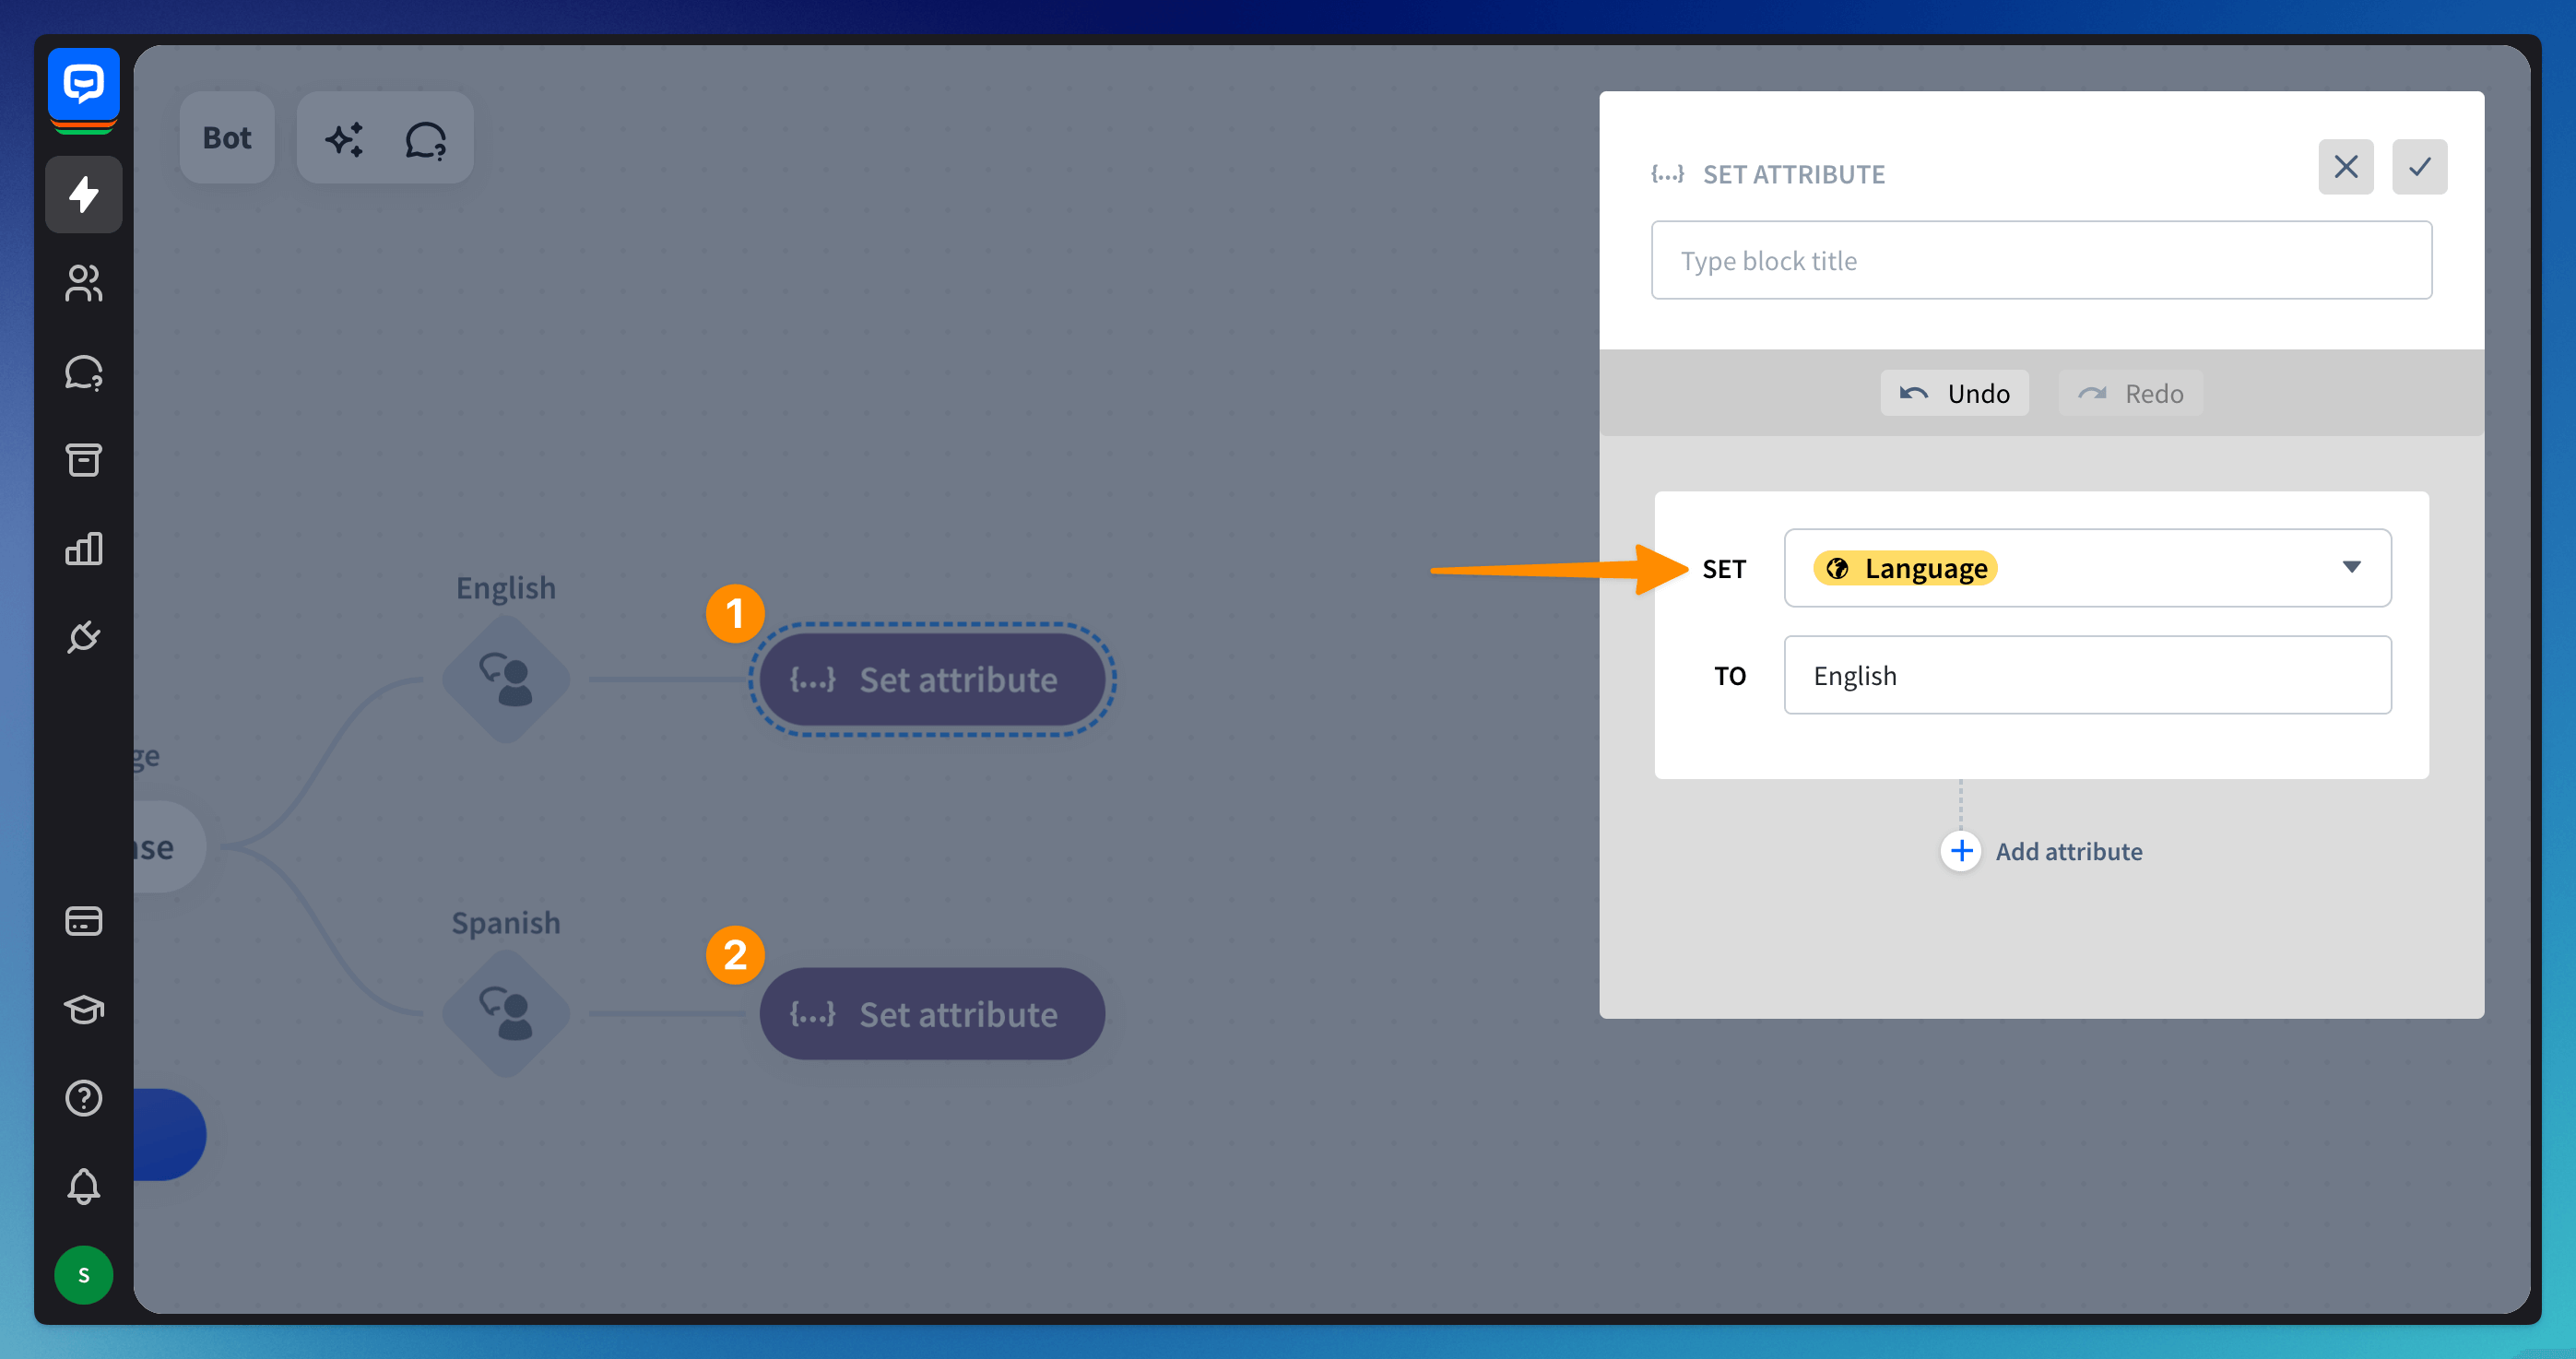
Add Set attribute blocks after User input blocks. Click on the actions and set values.
- SET attribute Language TO English
- SET attribute Language TO Spanish

-
Provide the messages in both languages after the Set attribute actions.
-
Test the bot flow in the Testing tool - the chat window provided in the visual builder.
How to use Set attribute with custom attributes
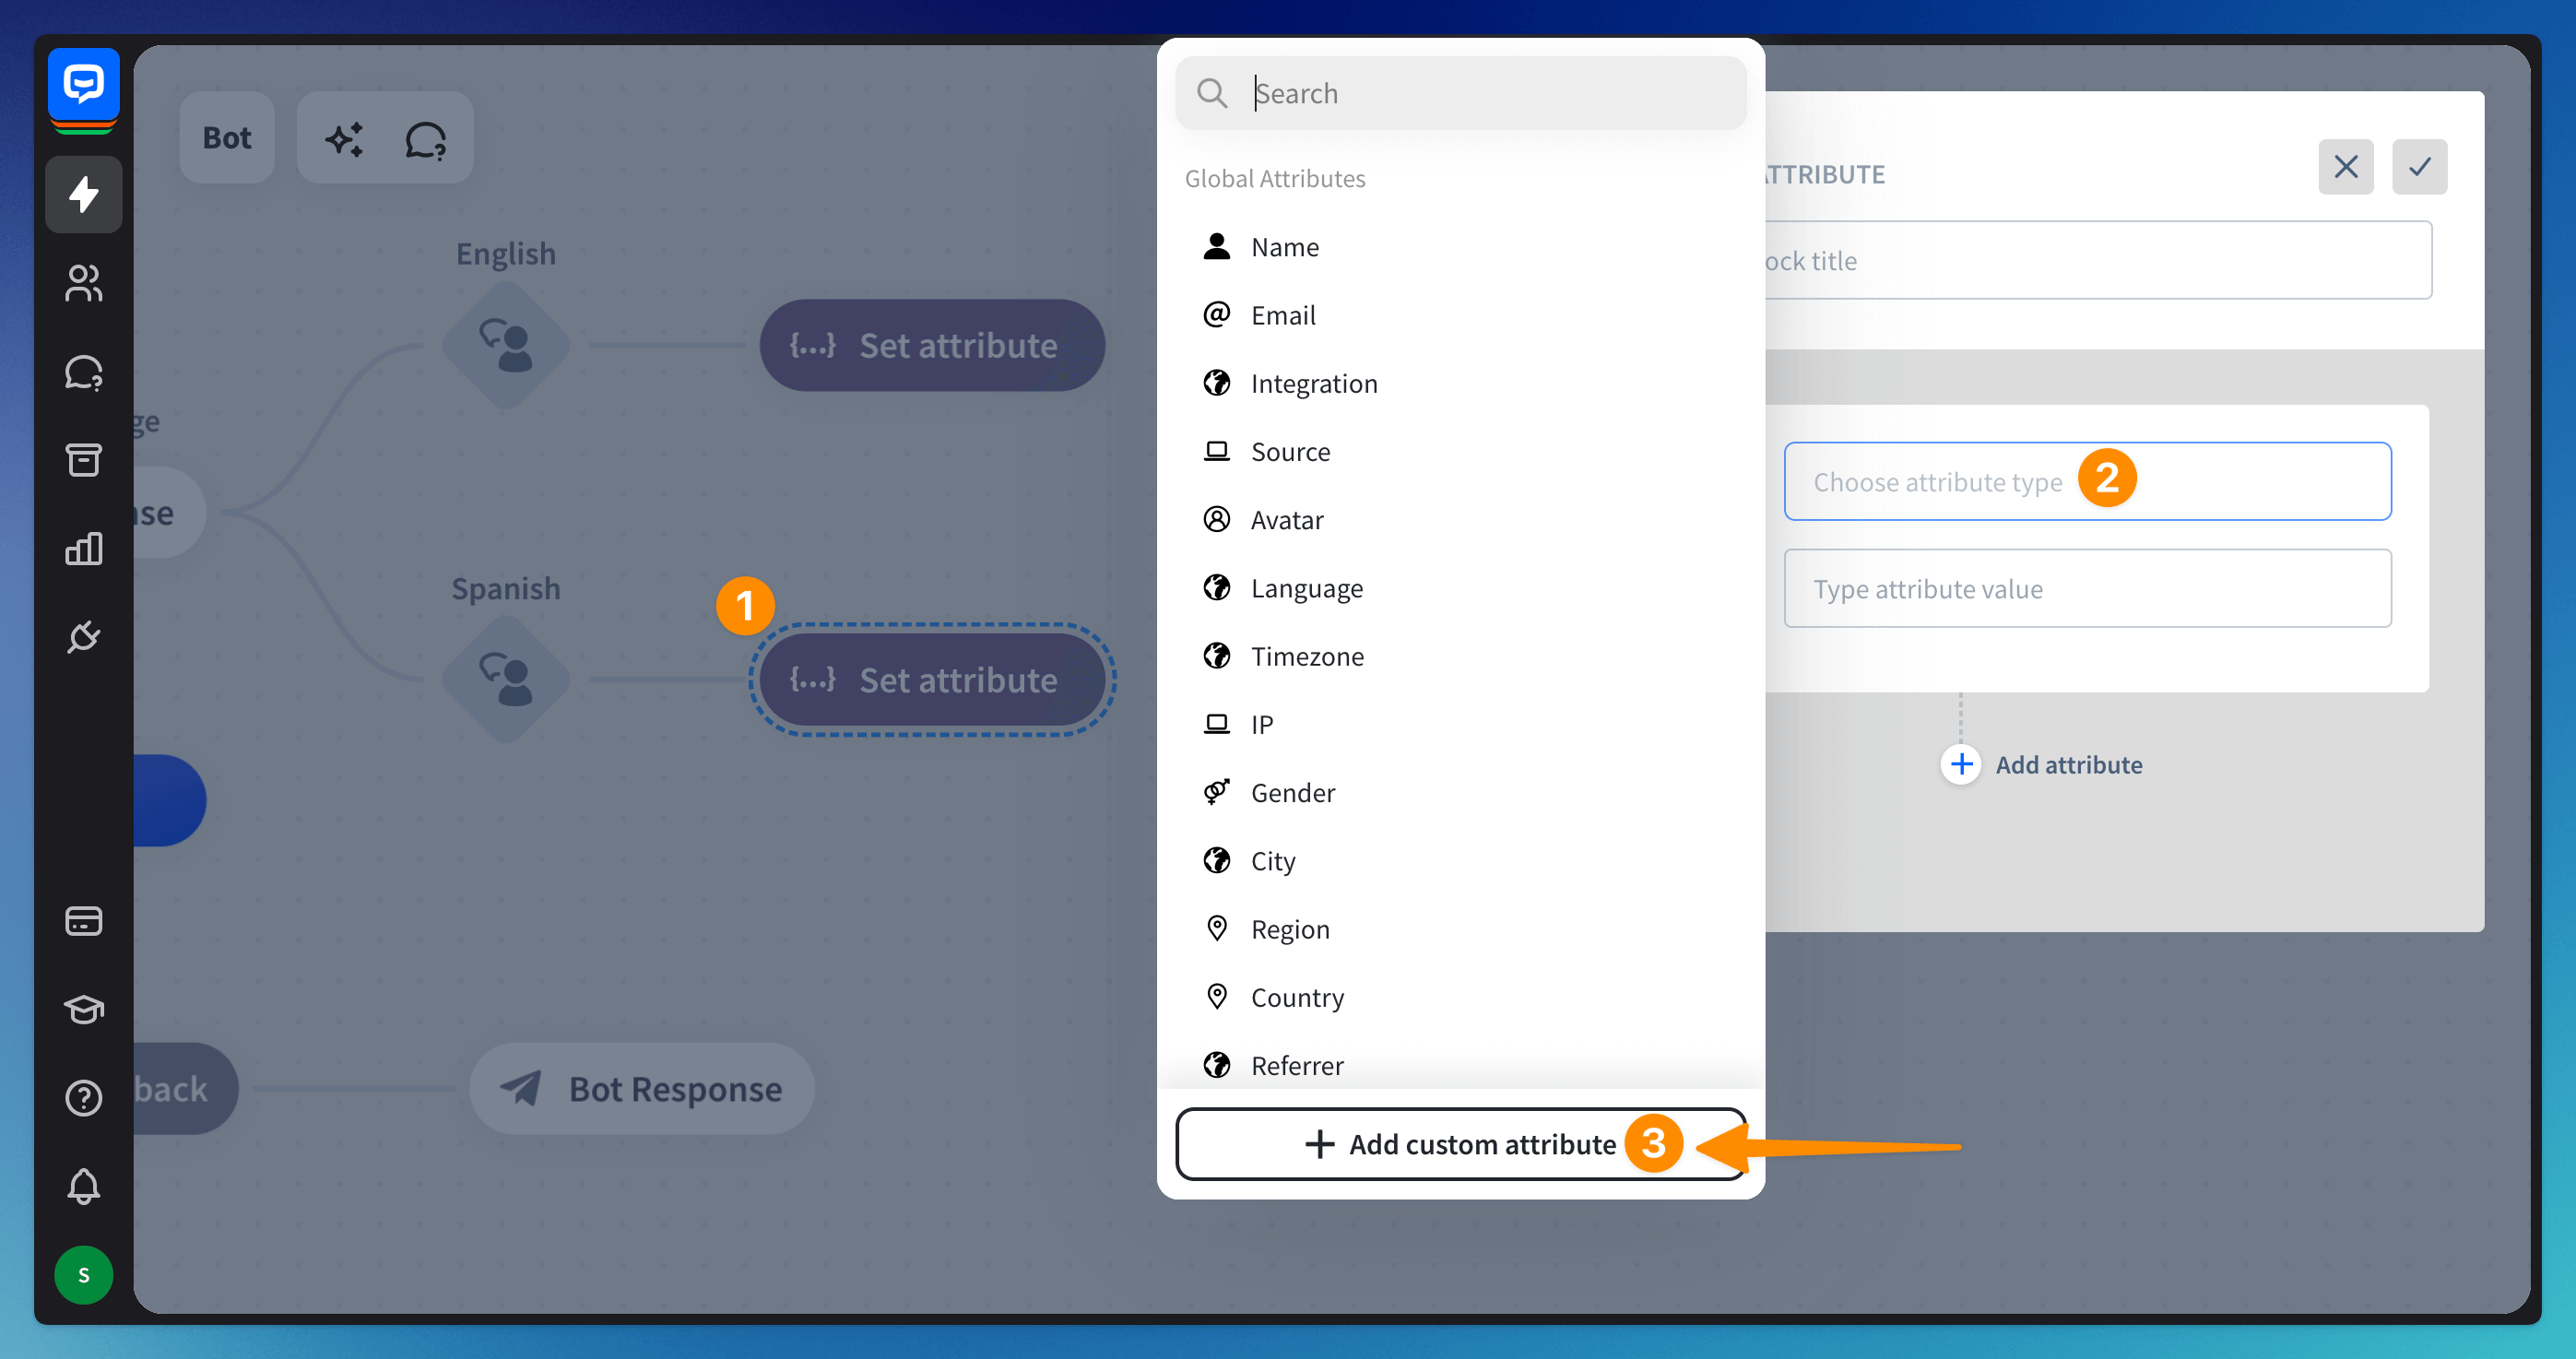
You can add a custom attribute to use more advanced information that doesn’t qualify as a default attribute. Add this attribute while setting the Set attribute action.
-
Click on the Set attribute block (1). Click the SET option (2) and choose the + Add custom attribute option (3) at the bottom of the menu.

-
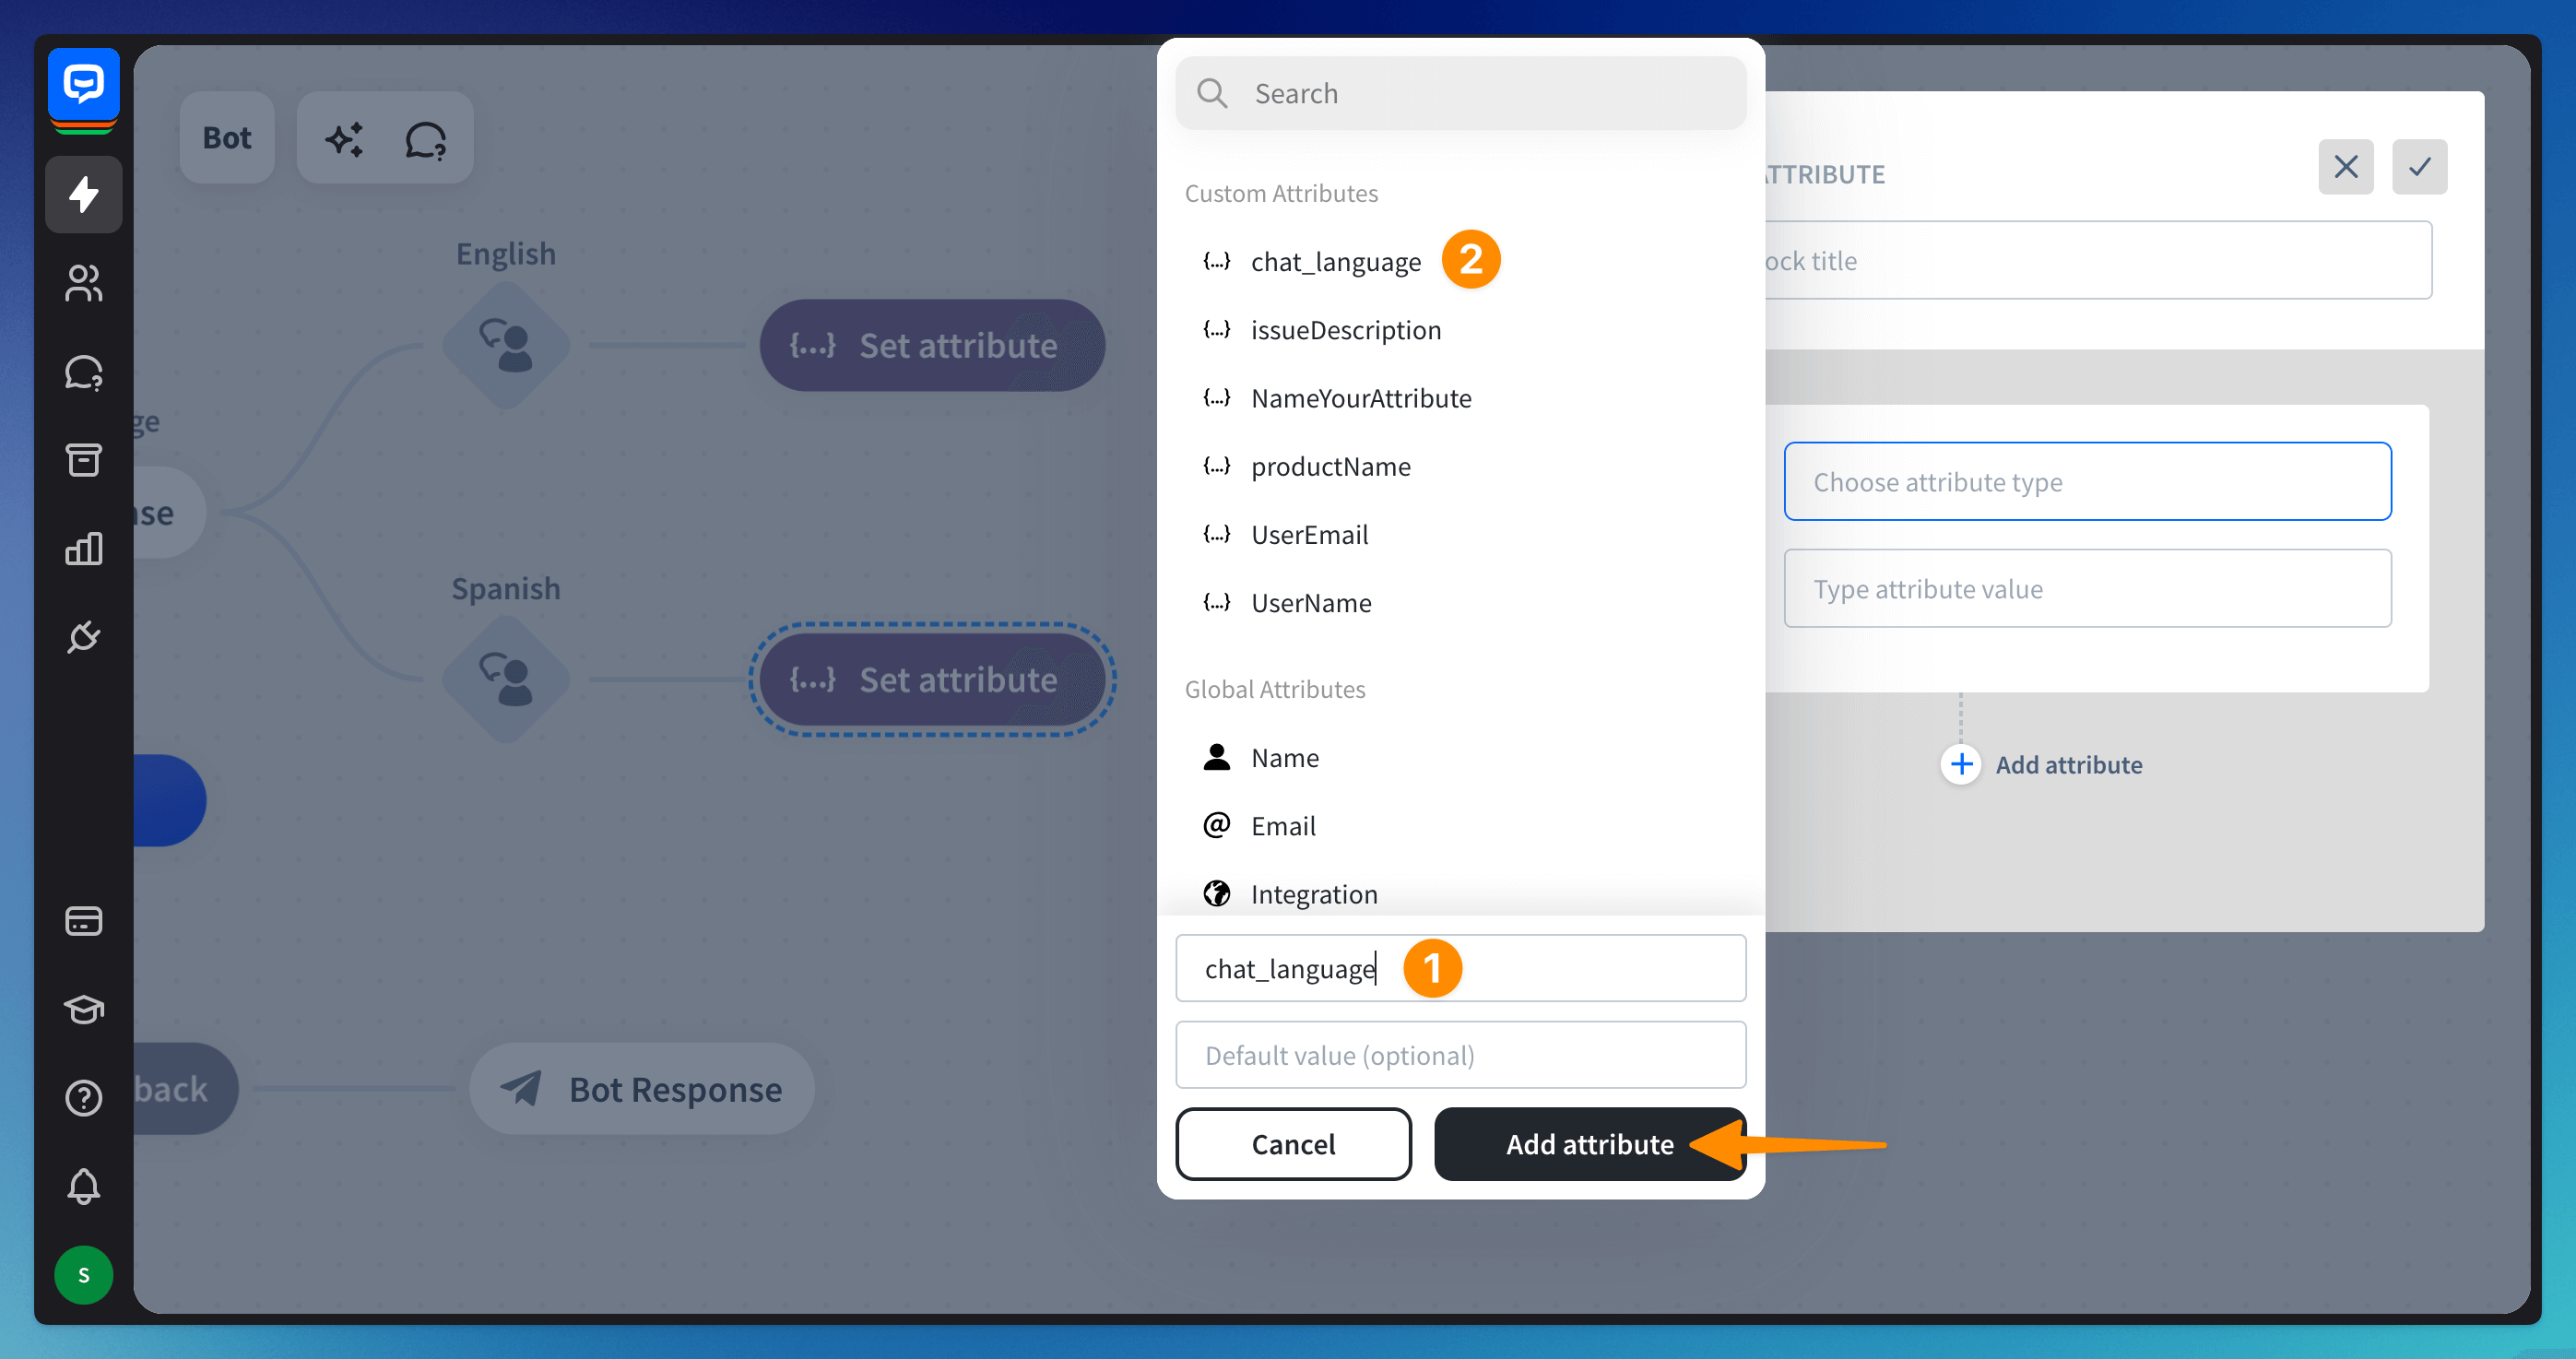
Provide the name of your custom attribute (1) and save it. The custom attribute will be visible in the menu above the default attributes (2) after you save the attribute.

-
Add a Bot response block to continue the chat. You can use the custom attribute the same way as the default attributes.
-
Test the bot flow in the Testing tool - the chat window provided in the visual builder.
The difference between Question and Set attribute actions
ChatBot allows you to collect information in several ways. The easiest way is to use attributes. You can collect them using the Question or Set attribute action.
While using the Set attribute action, you must create and collect the attributes in separate steps. In contrast, Question allows you to do it in just one step as you create and collect the attribute in the same place in the bot flow.
Like the Set attribute action, the attributes contained using the Question action can be saved, used, and modified throughout the chat. Also, it lets you ask multiple questions. Each answer is also saved automatically as an attribute.
The Set attribute action lets you keep only one attribute at a time. While the Question action is more efficient, sometimes you do not need to ask a question; you just need to set an attribute’s value in the bot flow. In such cases, the Set attributes action is more beneficial.
Read more: