You can adjust the legacy Chat Widget’s settings to match your brand style.
This article is about our legacy Chat Widget. You should use the new Chat Widget if you created the bot after September 30, 2024.
See how to configure and install the bot with the new Chat Widget. Also, check out a video tutorial on installing the bot with the new Chat Widget.
This article is about our legacy Chat Widget. You should use the new Chat Widget if you created the bot after September 30, 2024.
See how to configure and install the bot with the new Chat Widget. Also, check out a video tutorial on installing the bot with the new Chat Widget.
Configure legacy Chat Widget
On the right side of the configuration screen, you can preview the changes applied to your Chat Widget legacy in real-time. Choose from one of the views to see the minimized chat, welcome screen, or ongoing Chat Widget legacy view.
You can also see the changes and test the bot on the Sample page — this page imitates the installed bot working.
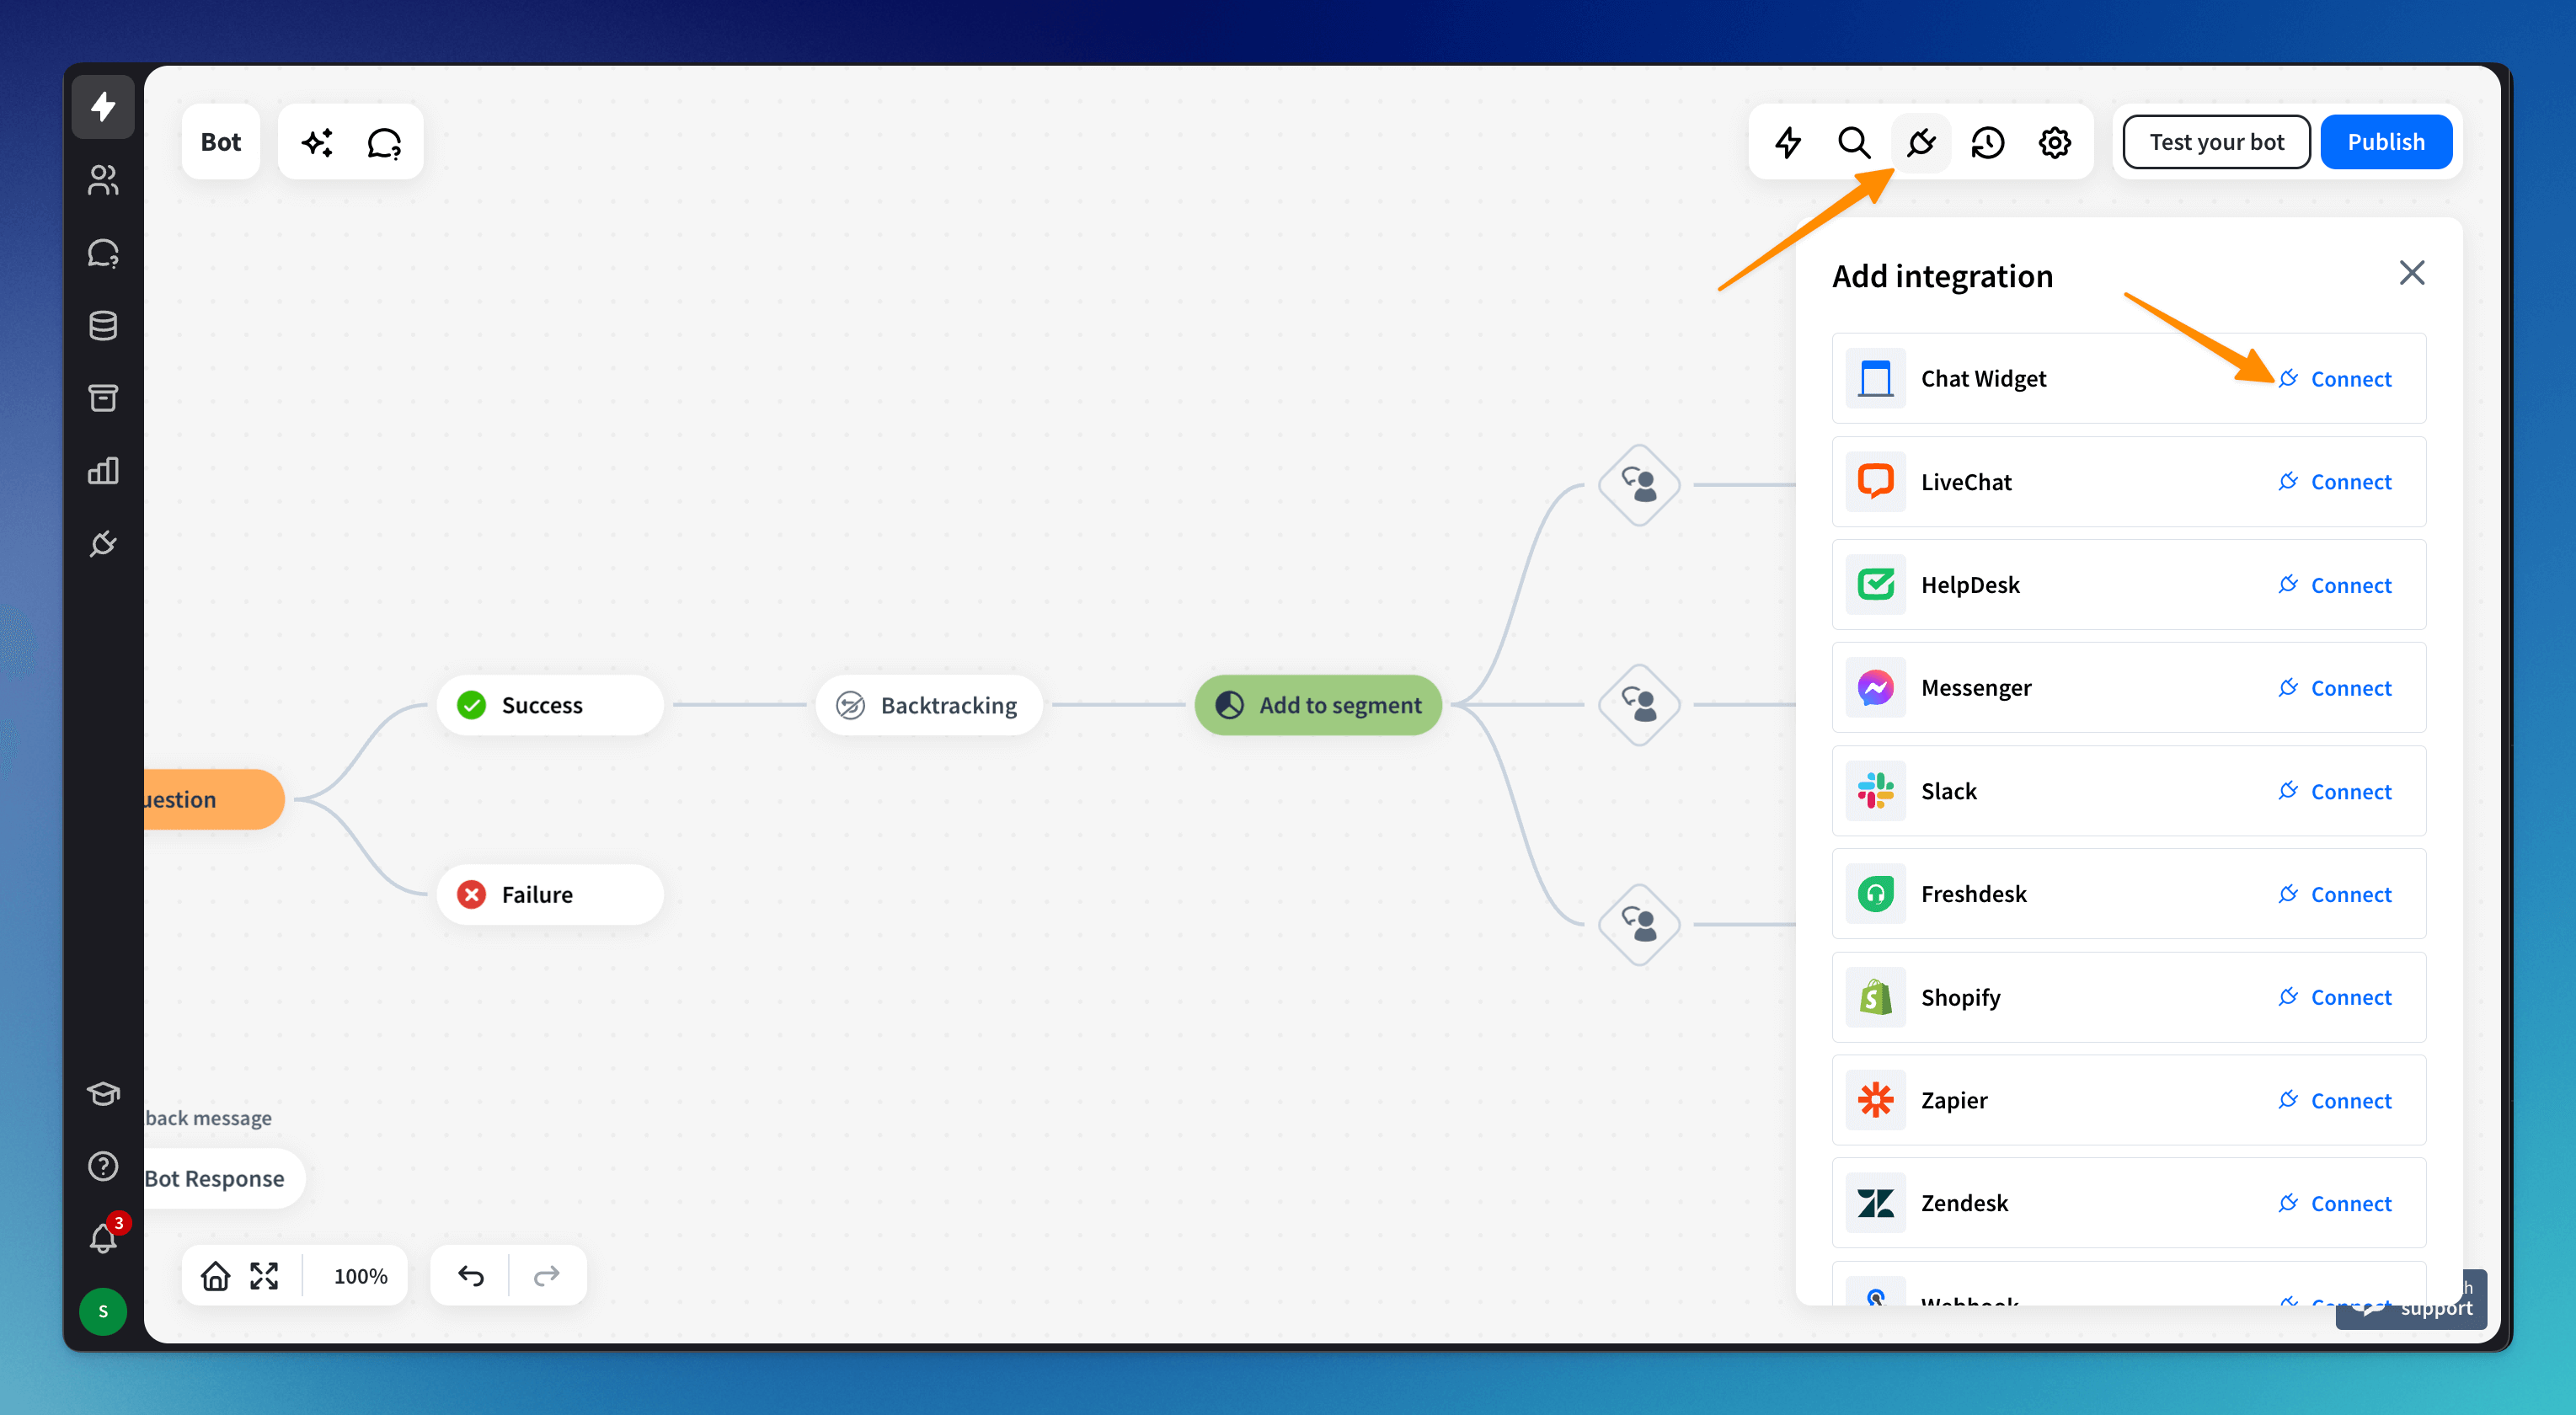
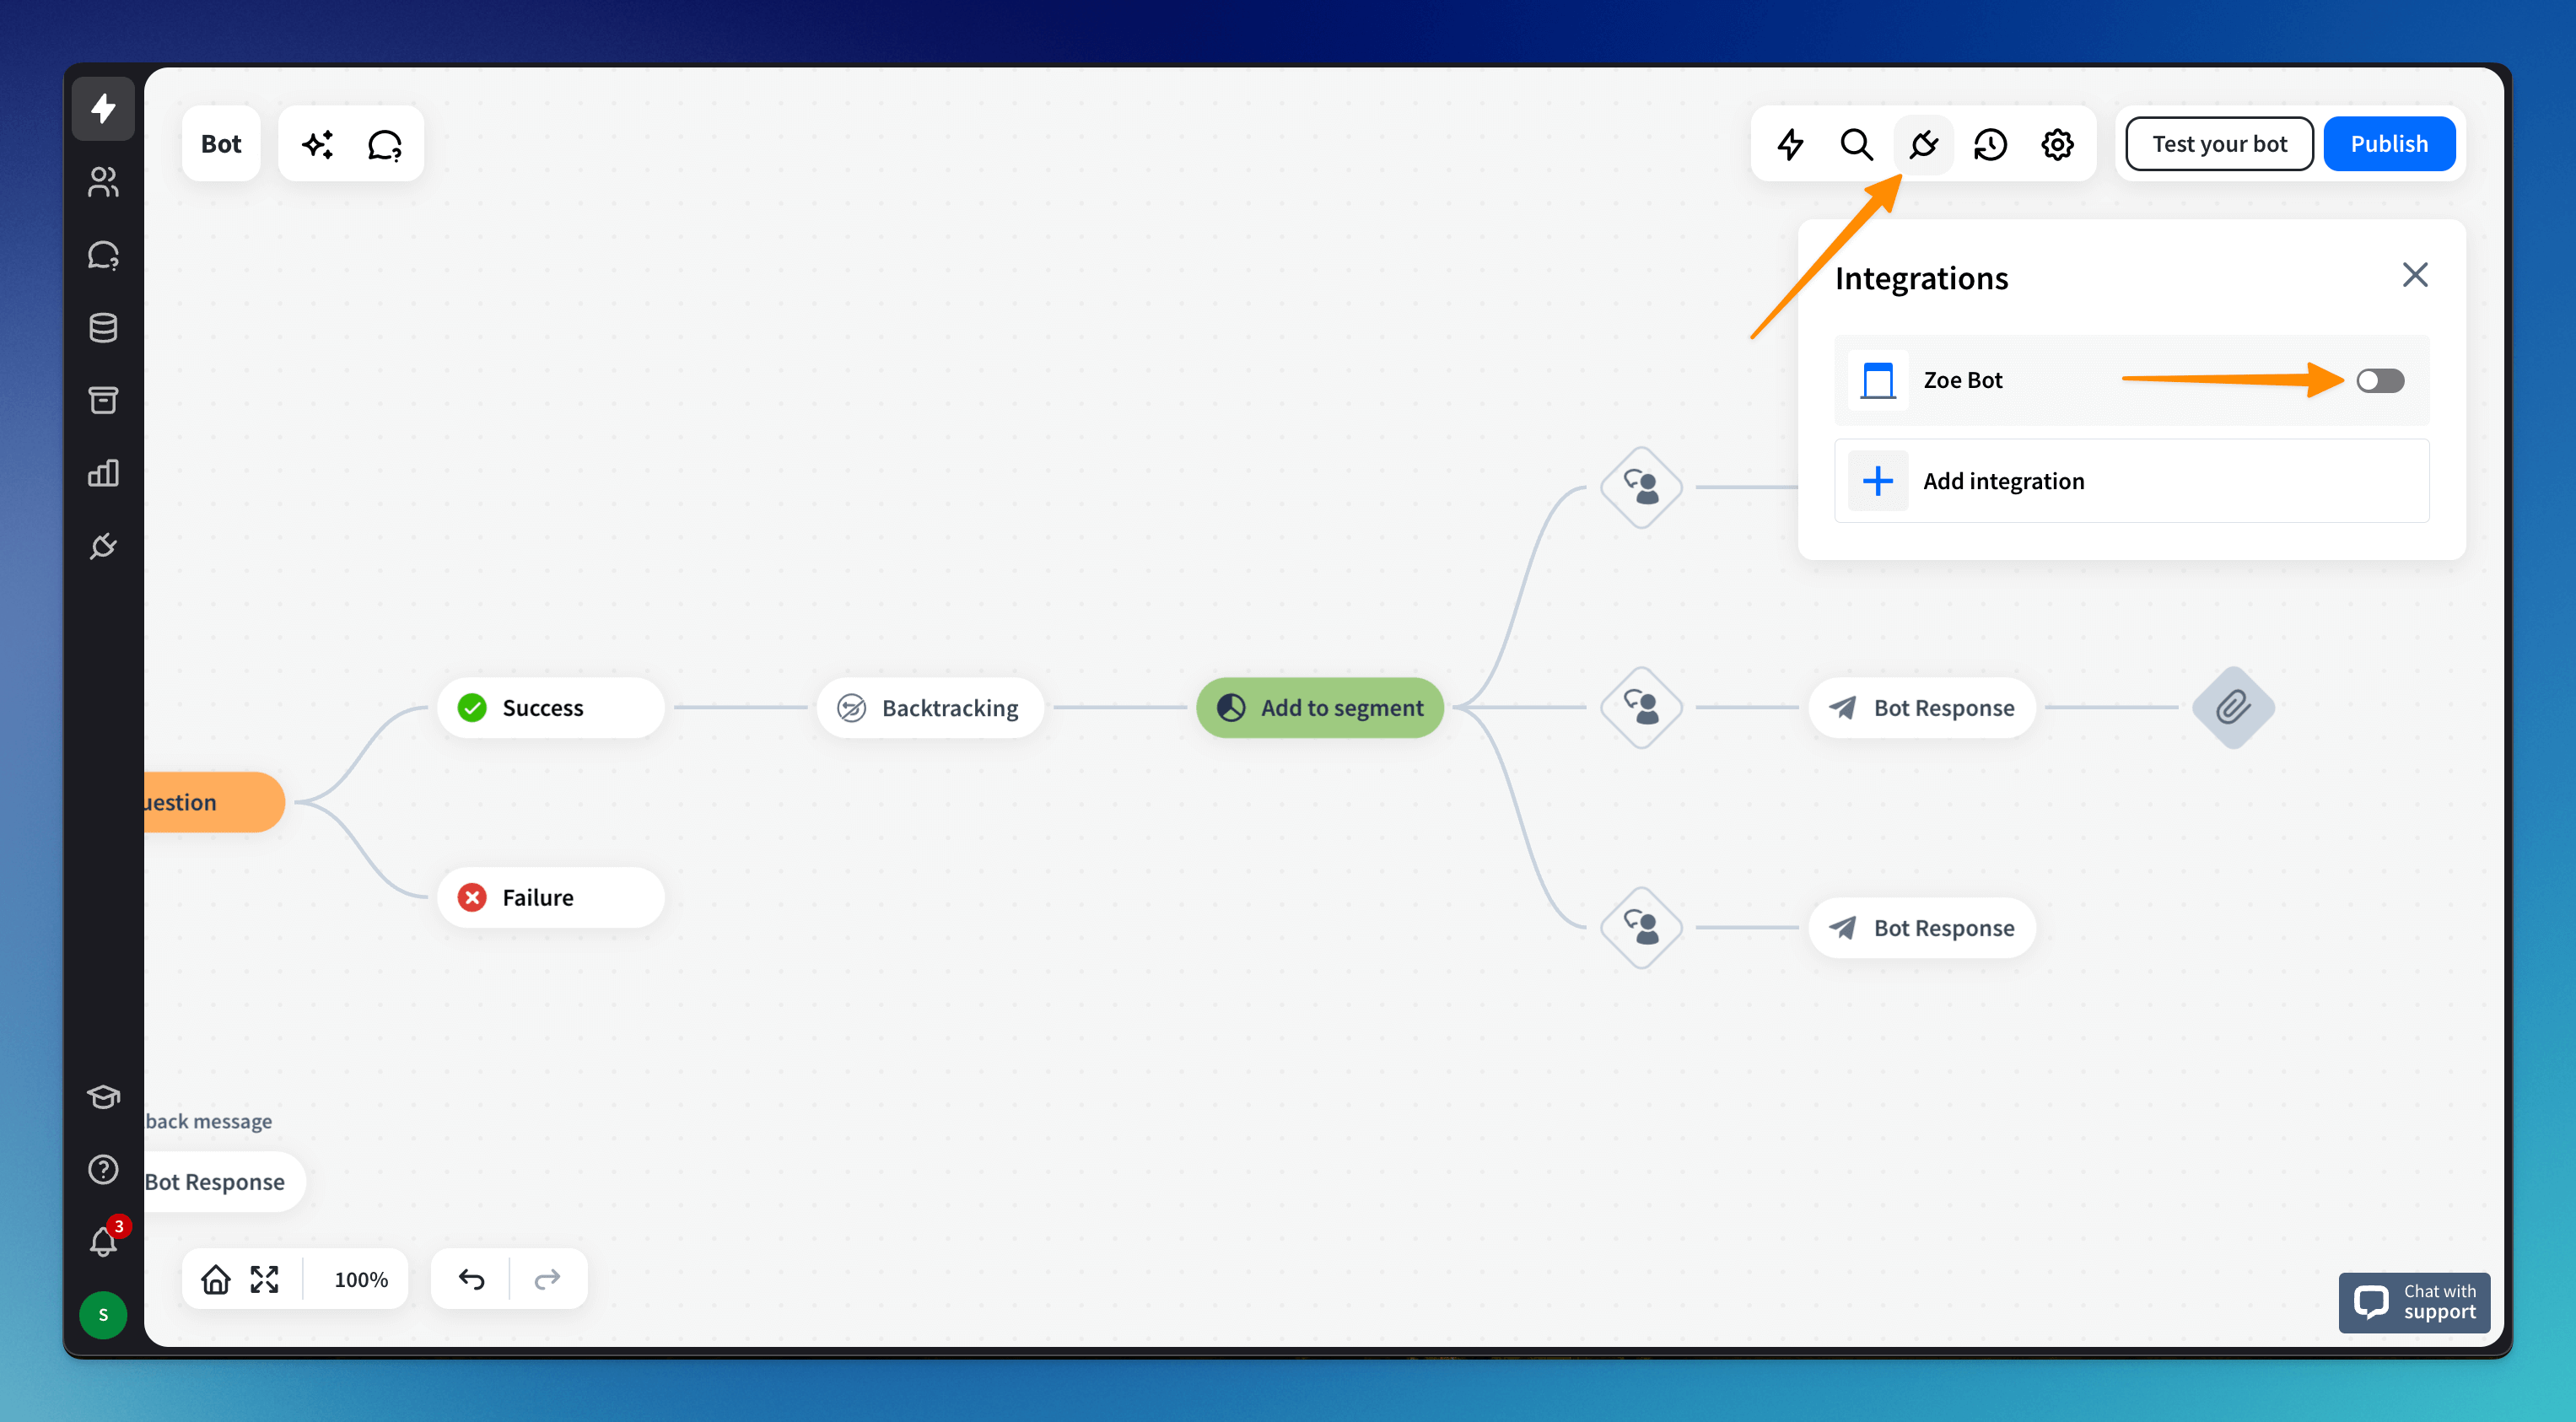
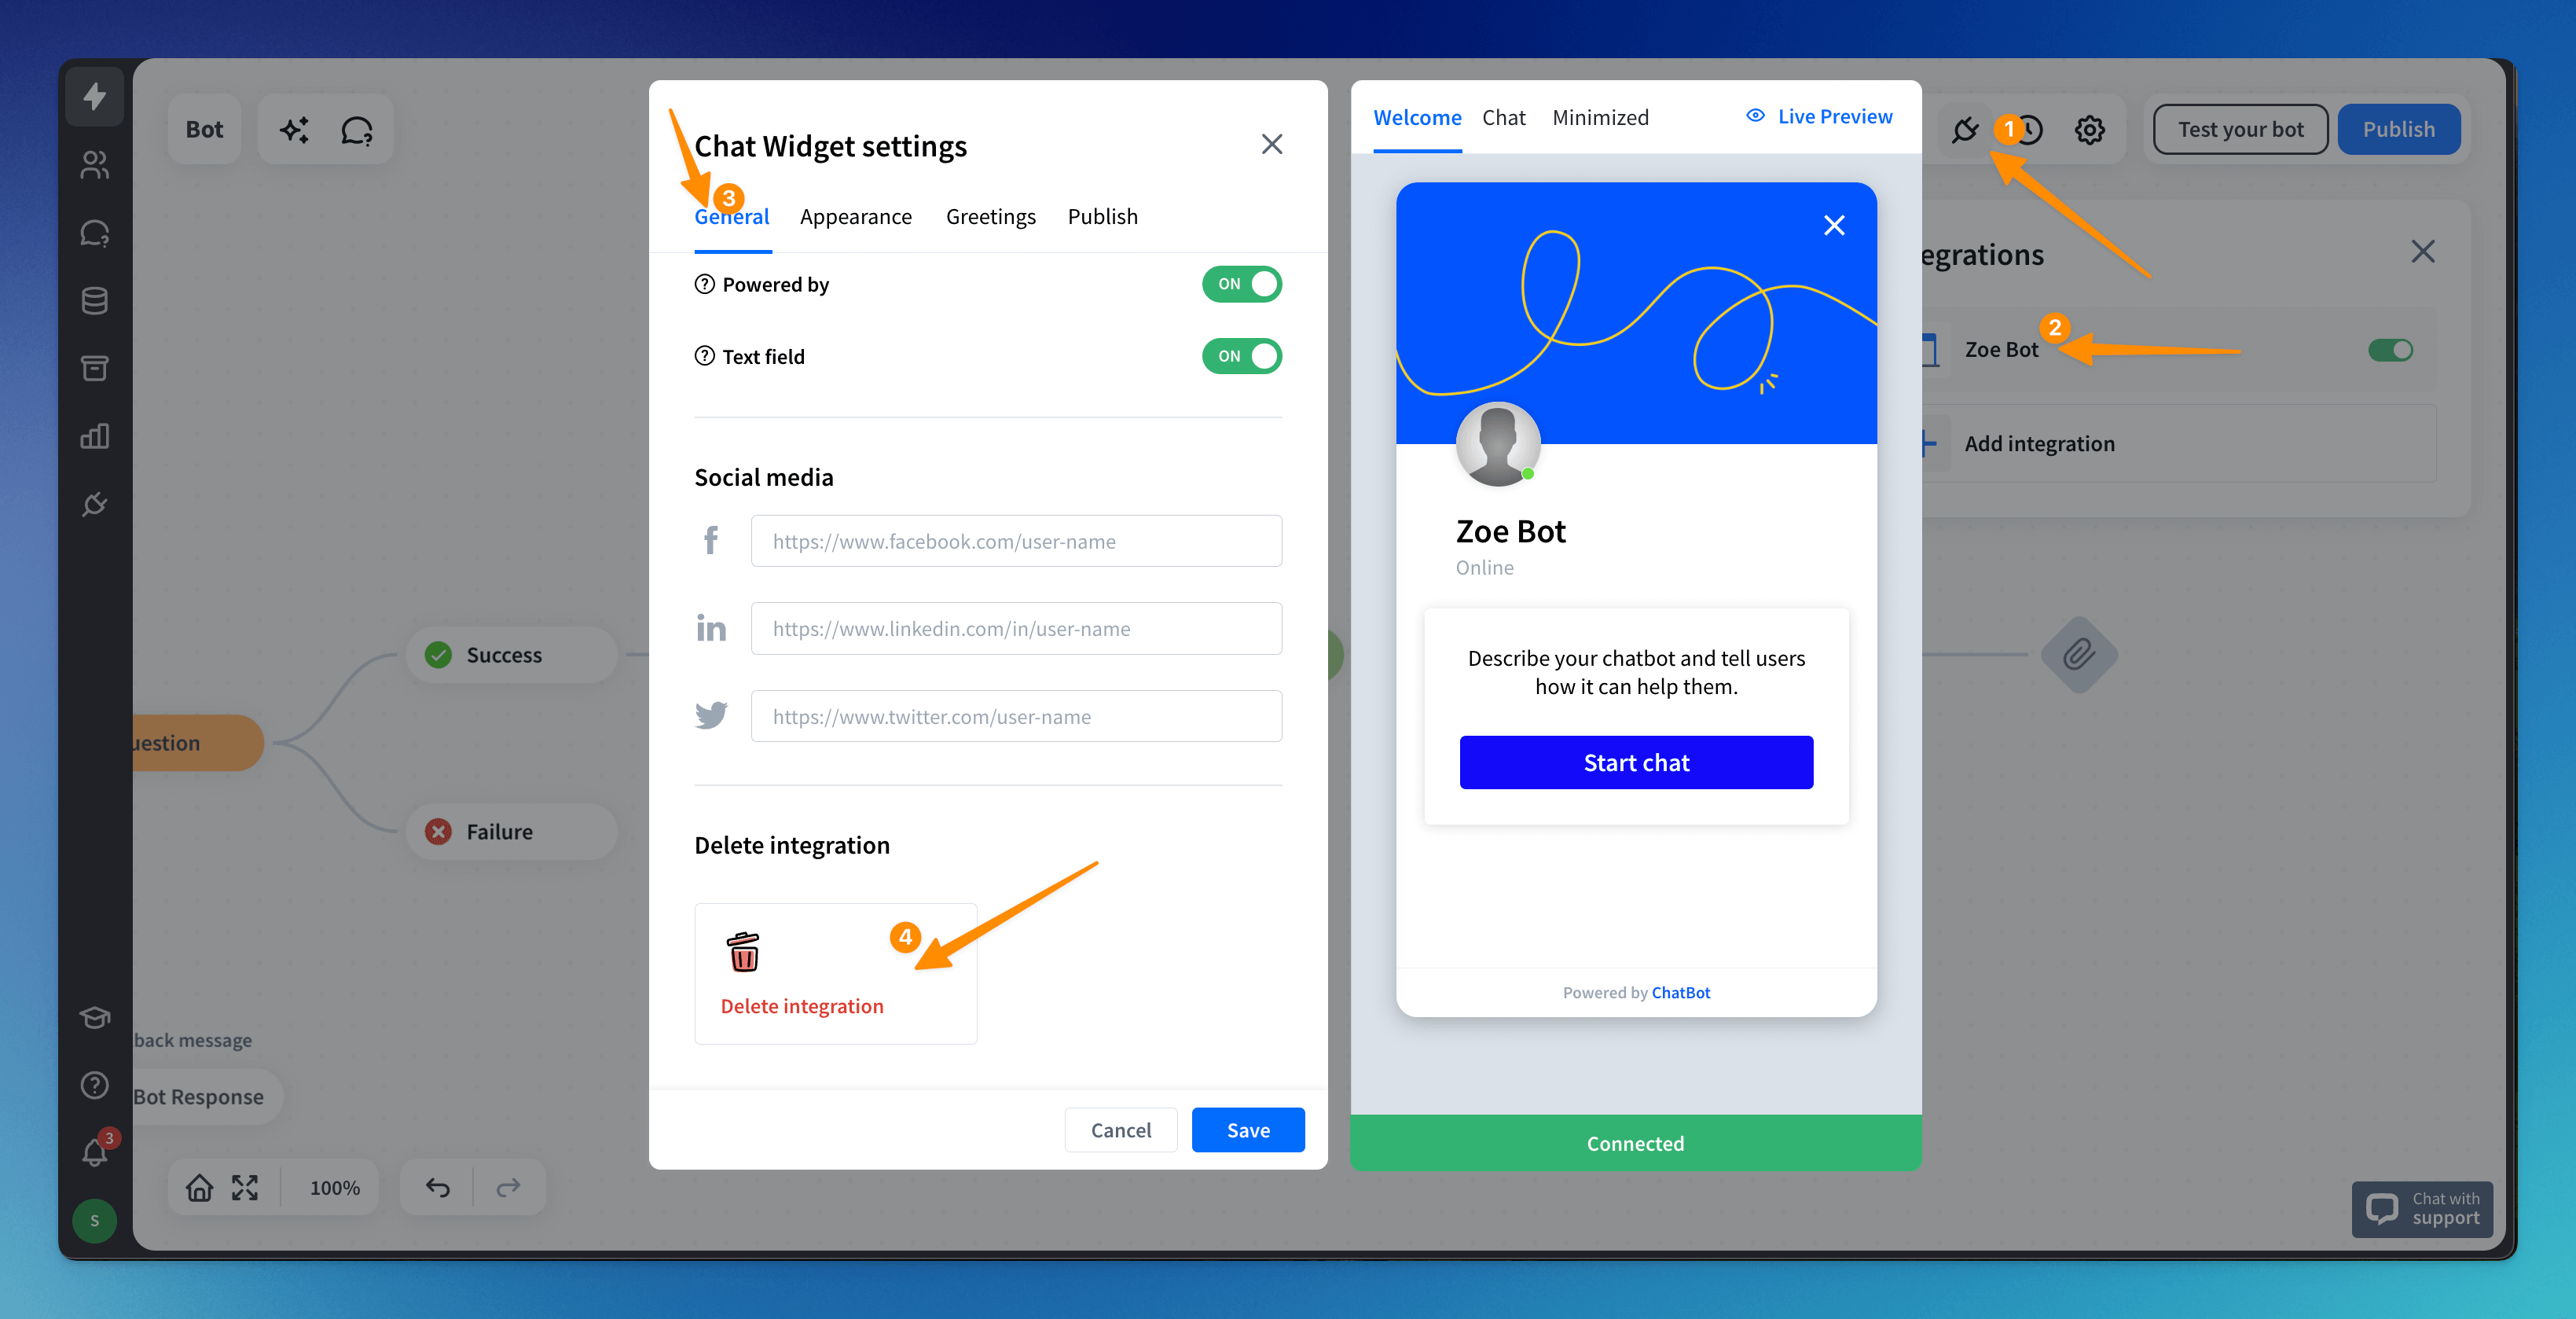
To configure legacy Chat Widget settings, open the Integrations plug icon, and connect the Chat Widget legacy integration. Go to the General section.
 Set up your settings.
-
Welcome screen - show the welcome screen with a description and your social media links before the chat starts
-
Bot name - change or leave the default bot name
-
Description - briefly describe your business and explain how the chatbot can help the user
-
Powered by - leave or remove the Powered by ChatBot label from your Chat Widget legacy (white label). This option is available only in Business and Enterprise plans.
-
Text field - turn the Chat Widget legacy text field off; **when disabled, the typing field will be enabled only when the user triggers the Question action
**You can only disable the typing field when you use our native ChatBot Chat Widget legacy. You cannot switch the field off if the bot is integrated with Slack or Facebook Messenger.
If you have the bot integrated with LiveChat, use the LiveChat Chat Widget on your site. In the LiveChat integration configurator, you can disable the typing field.
-
Social media - share your social media links directly on the welcome screen
Customize legacy Chat Widget
To customize your Chat Widget lgacy settings, open the Integrations plug icon, and connect the Chat Widget legacy integration. Go to the Appearance section.
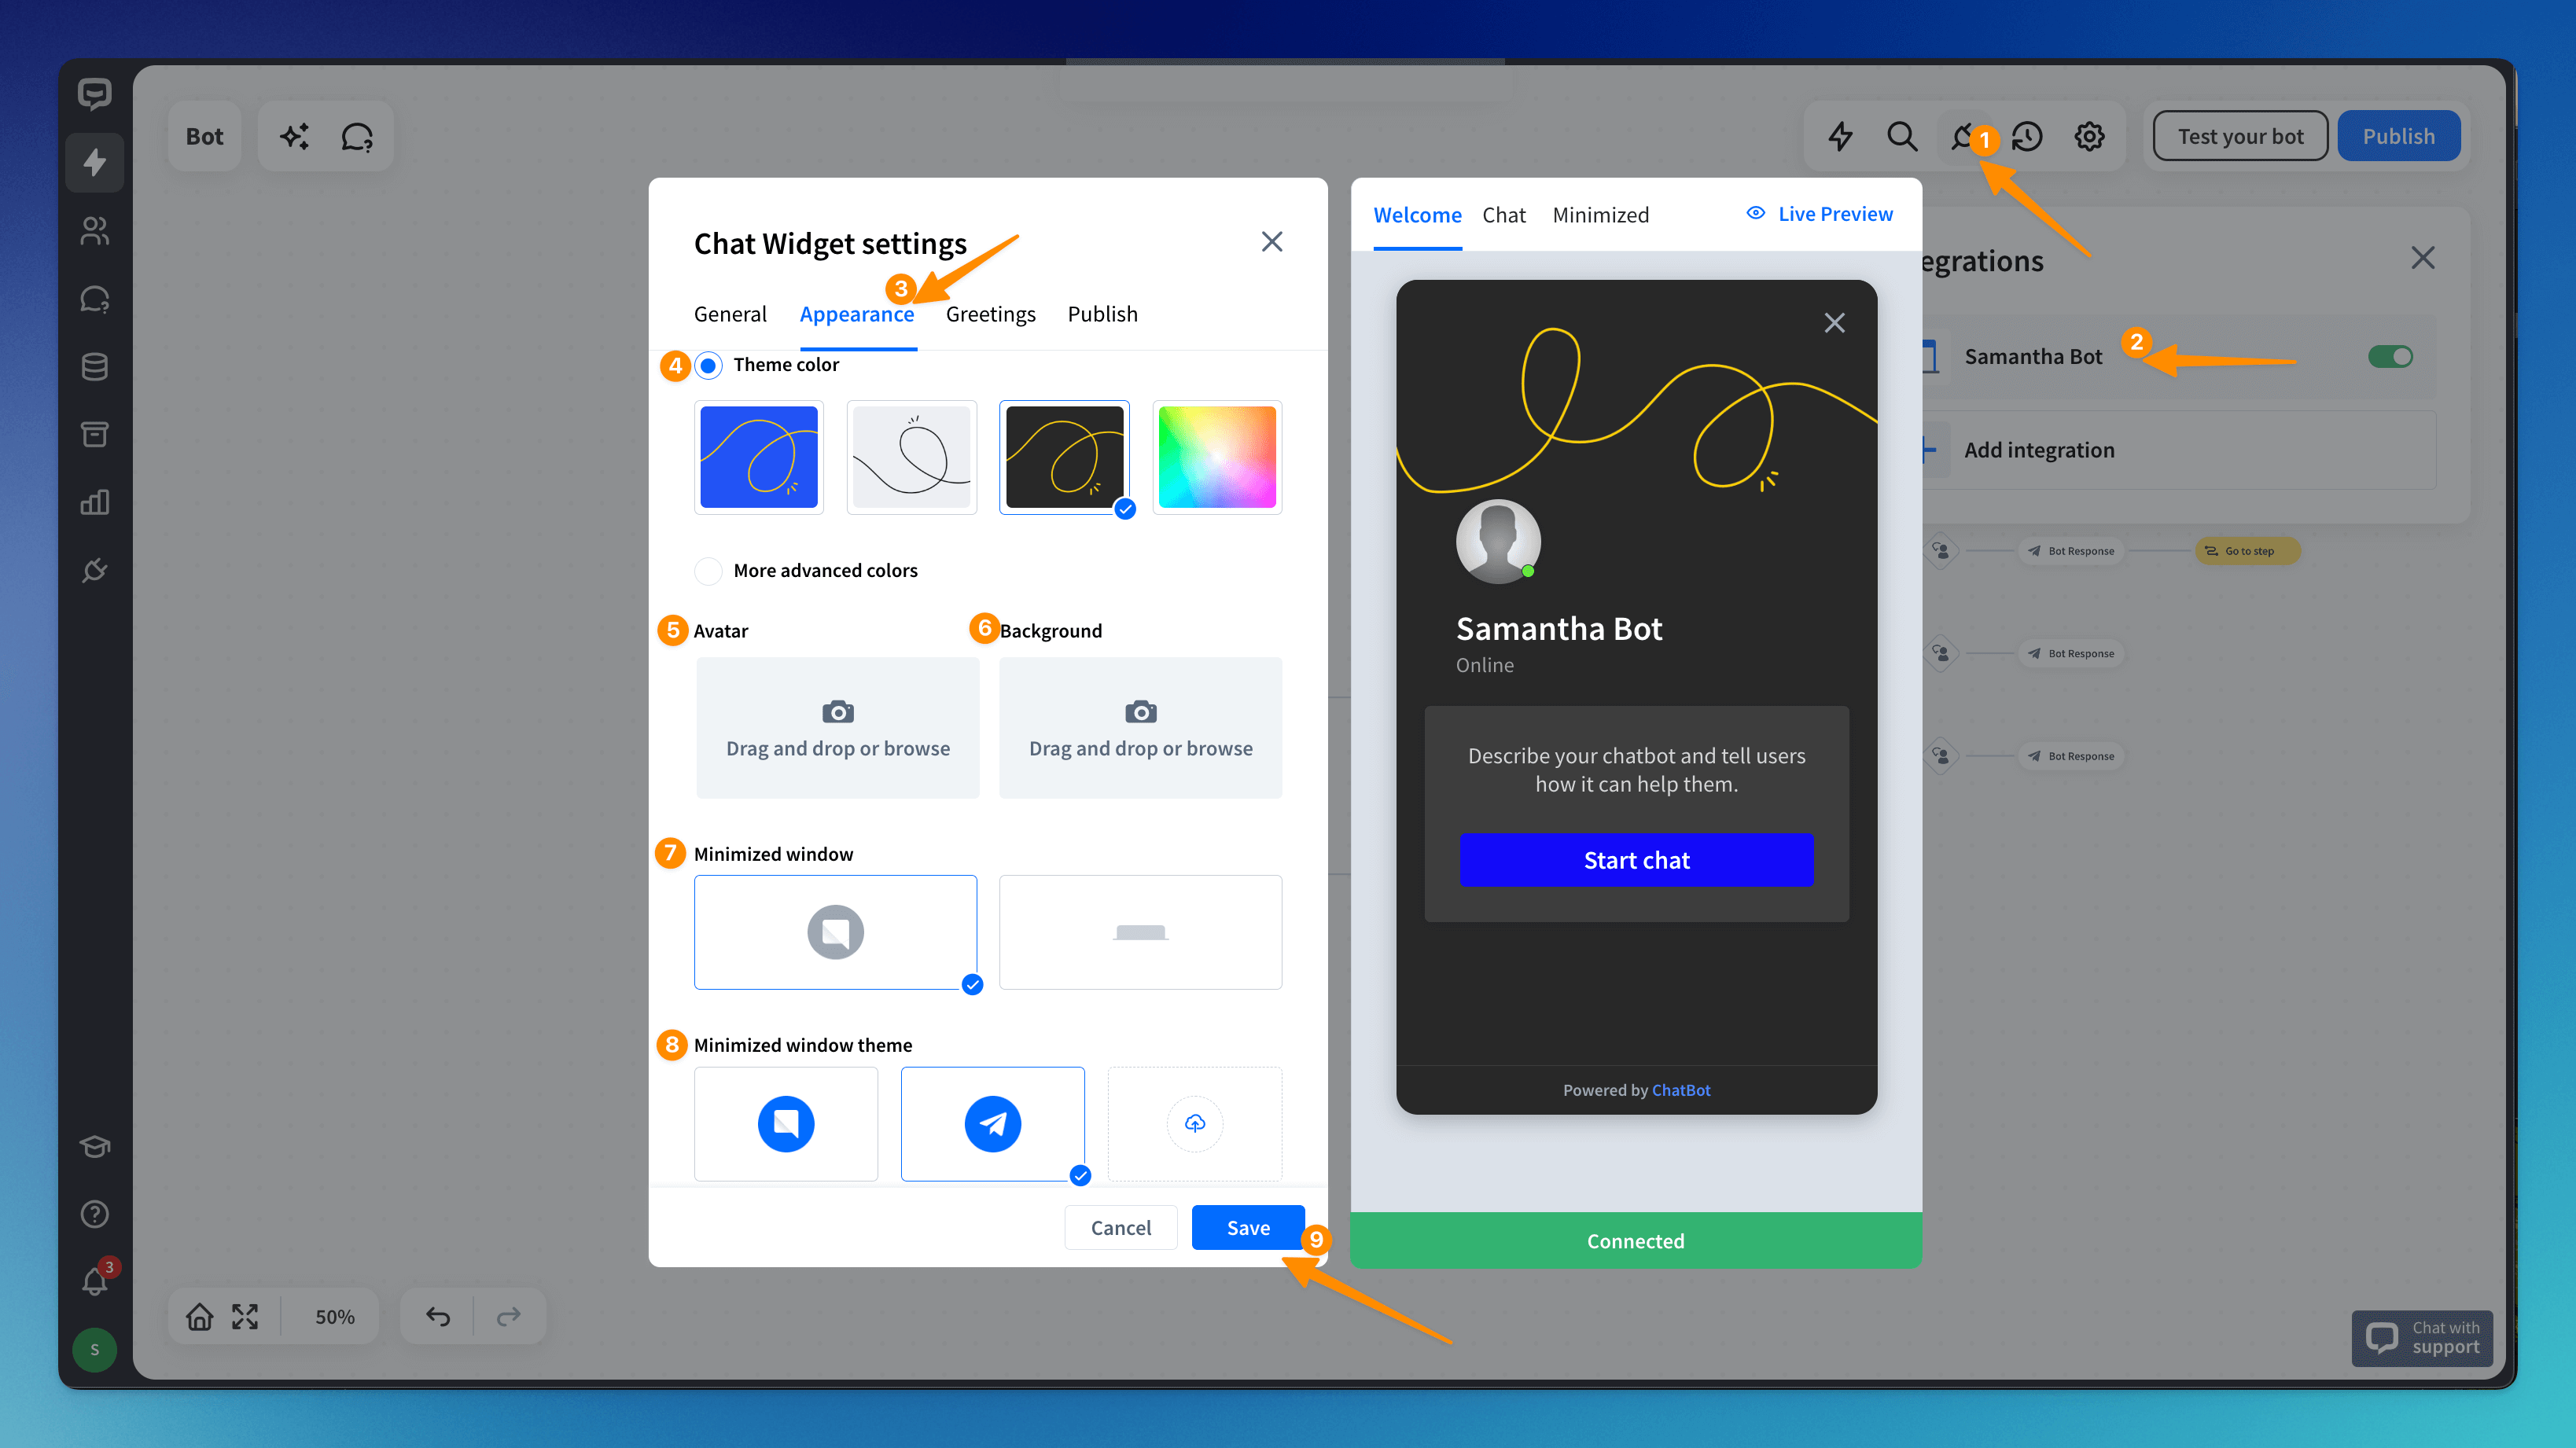
Make the necessary changes:
-
Theme color - choose from ready-to-use presets or configure your colors by selecting the More advanced colors option
-
Avatar - upload your own avatar by dragging the image; if not, the default avatar will be displayed
-
Background - upload your own background image by dragging the image; if not, the default image will be displayed
-
Minimized window - define how your minimized window should look - choose the bubble or the bar widget
-
Minimized window theme - choose the bubble icon, or customize the text for the bar option
-
Customize the position of the ChatBot Chat Widget legacy - decide where the Chat Widget legacy should appear on your website. You can choose between the left and right sides of the screen, define the spacing between the legacy Widget and the corresponding bottom and side edges.
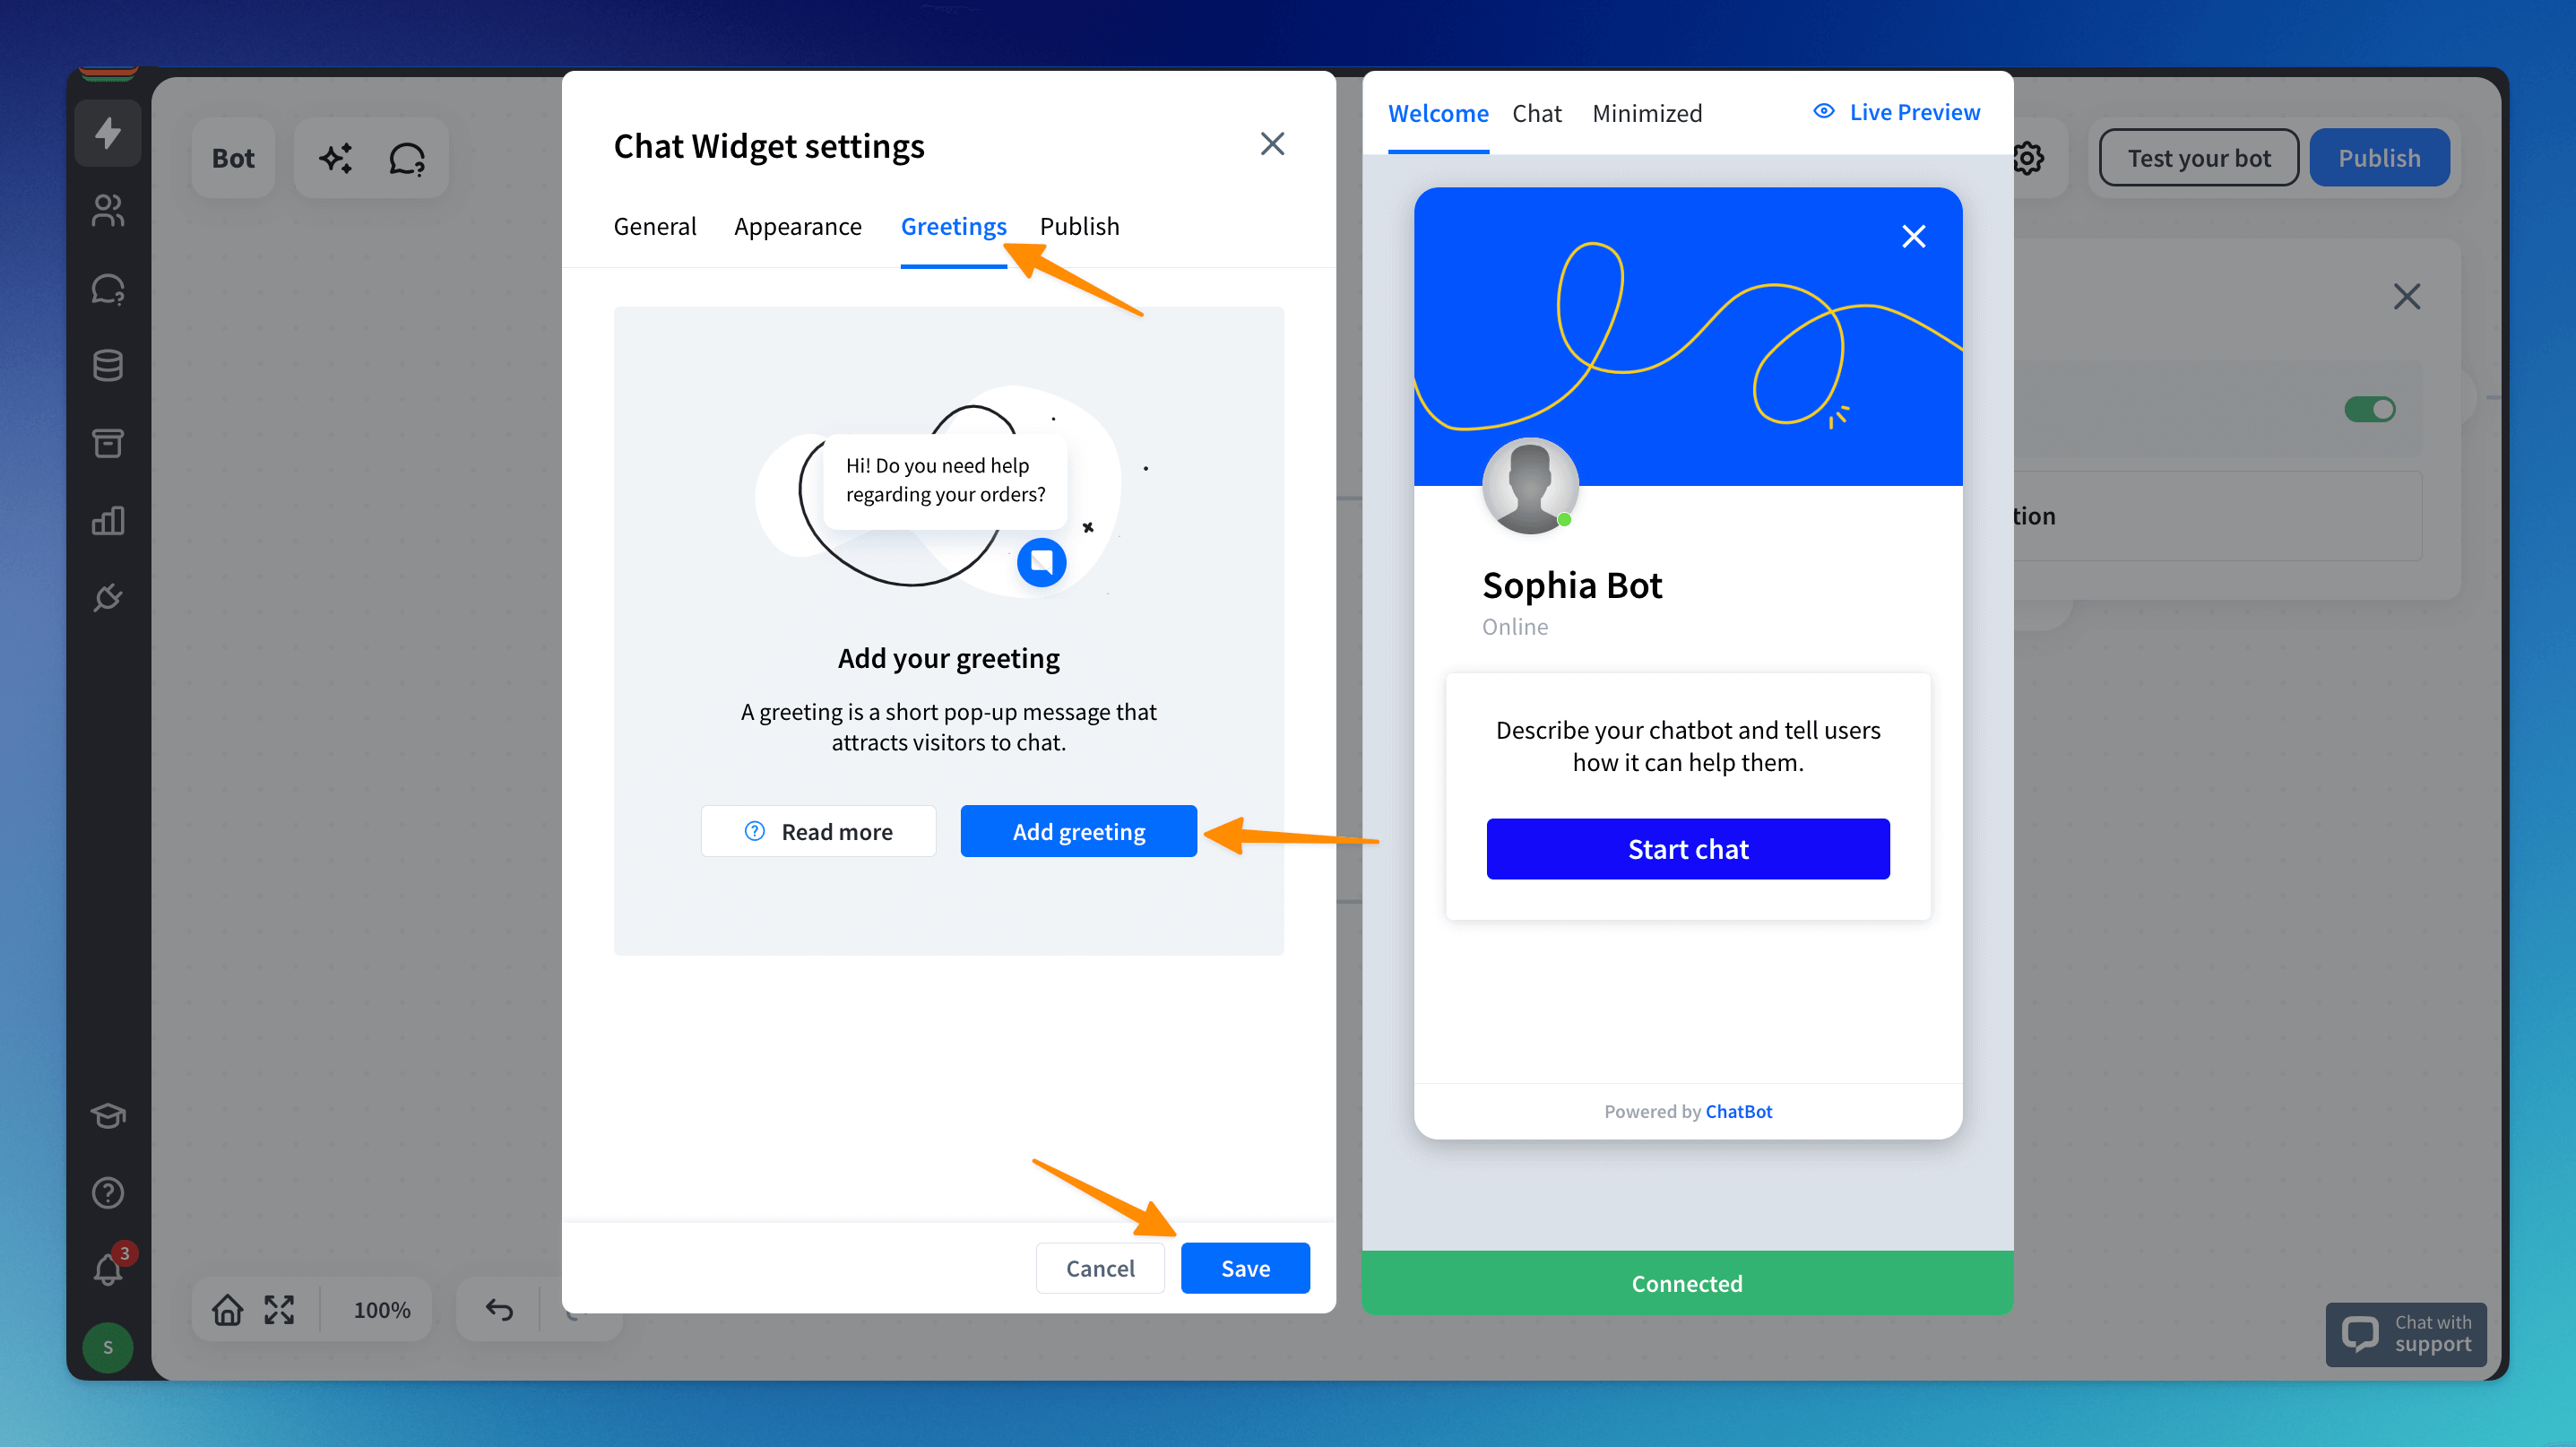
Add greetings
The greeting feature lets you display a pop-up message above your website’s minimized Chat Widget icon. This can be used to catch users’ attention and encourage them to start chatting.
Go to the Greetings section and choose the Add greeting button. Add the greeting’s title and message. The title will not be visible to users. Then, set conditions for the message to be displayed.
Install a bot with legacy Chat Widget
When the bot is integrated with LiveChat, all changes should occur in the LiveChat Chat Widget configurator, which should be installed on your site. See how to customize the LiveChat Chat Widget.
If you have the bot integrated with Facebook Messenger or the bot integrated with Slack, you cannot adjust the chat window, as the integration does not use ChatBot chat windows.
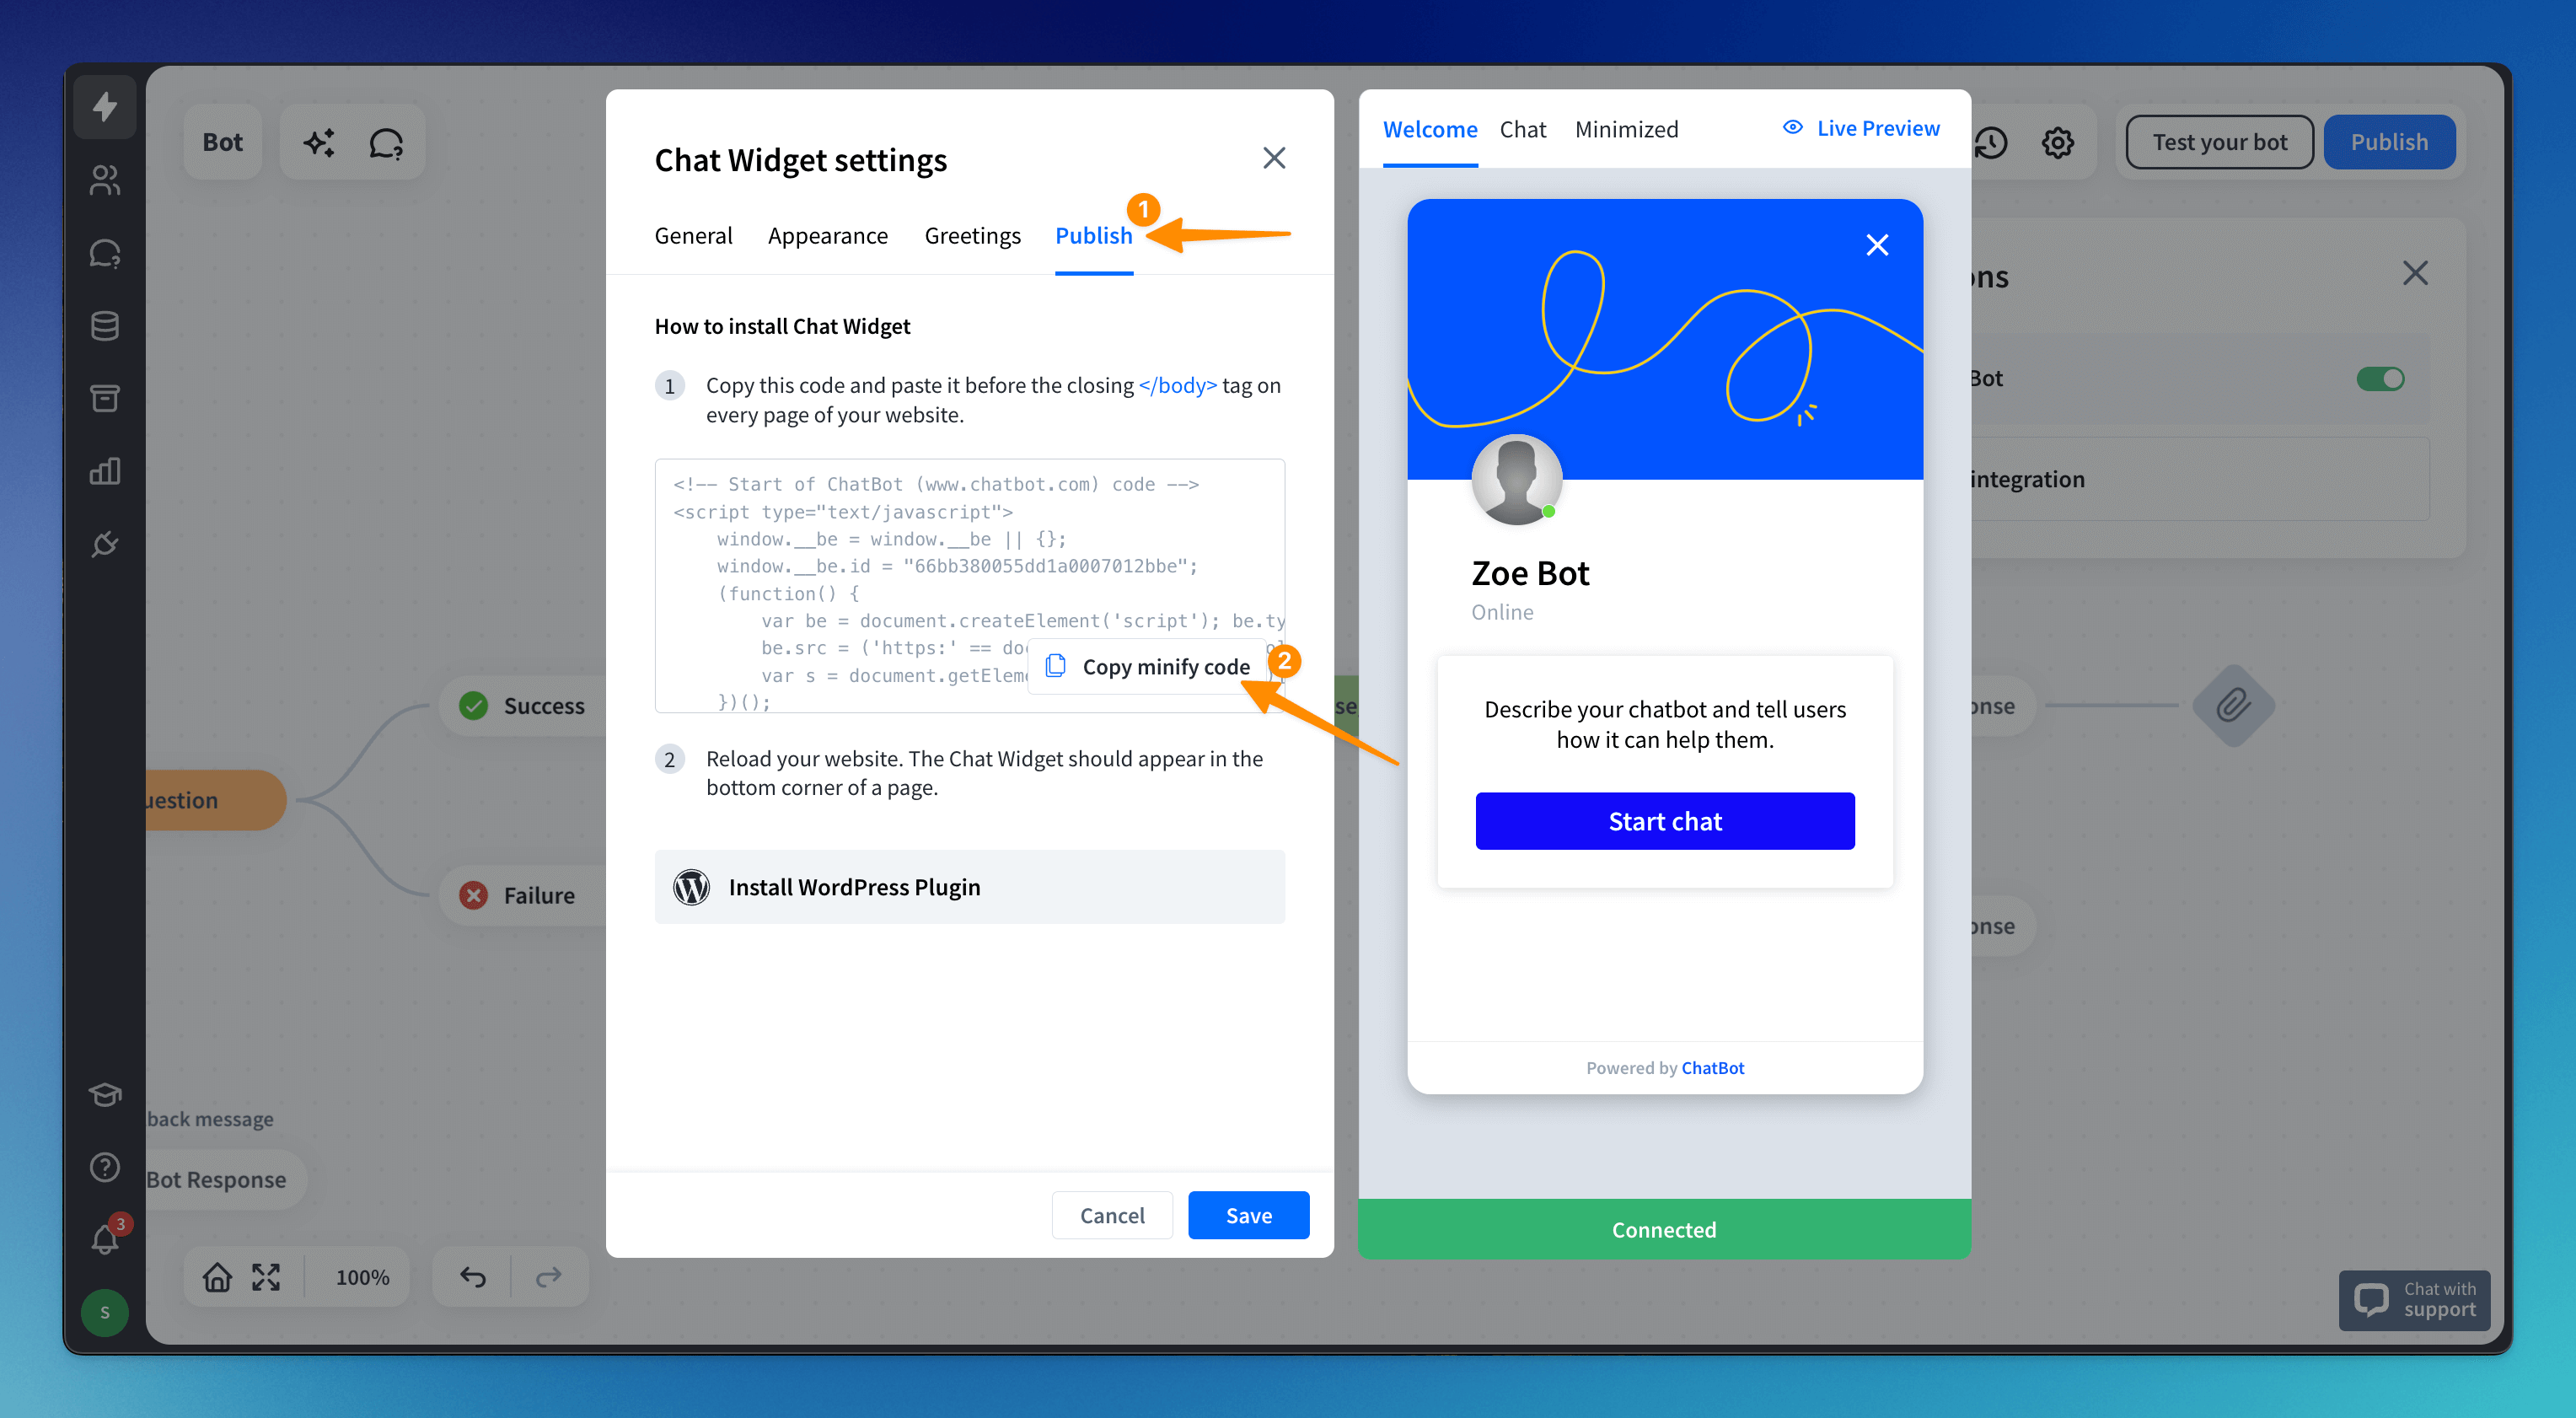
Before you install the bot on your site, you must ensure that all the changes in the bot flow are made. Before you paste the code, you can configure and customize the legacy Chat Widget. The changes will be visible when you save them and publish the bot.
-
Open your bot and go to the Integrations icon. Click Connect next to the Chat Widget legacy option.
-
Go to the Publish section and copy the code.
-
Paste the code to your website’s source code before the /body closing tag.
Embed legacy Chat Widget on a website
By default, the Chat Widget legacy can’t be embedded as an element of the page. However, there is a workaround that lets you do it. See how it can look here.
You can check our GitHub repository for the source code. There are two files:
-
widget.html - contains the installed code to open the plugin when the page loads
-
index.html - contains the iframe element to load it at a specific place on the page
Embed legacy Chat Widget on other platforms
ChatBot provides free and ready-to-use integrations that allow you to add a bot to e-commerce platforms or connect it with popular web builders. Follow the following tutorials to learn more:
Connect ChatBot with any service using Zapier
Disable legacy Chat Widget
To disable the bot without erasing it completely from your site, go to the Chat Widget legacy integration and switch the integration toggle to the off position.
Delete legacy Chat Widget
To delete the integration from your site, delete the tracking code from the source code or go to the Chat Widget legacy integration and delete the integration using the button in the General section.
Read more:
