Under some legal acts such as the GDPR, you may need to provide your customers with detailed information regarding the i.e. gathering of their personal data, whether it is done by you or by a third-party processor. You may also have other legal obligations to fulfill. This can be accomplished in two ways:
-
If you operate an e-commerce store where customers can make purchases, you can modify the agreement between you and your customer to include details about, for instance, the data processing that takes place during a chat.
-
If you’re not using ChatBot for sales, it may still be important to inform your website visitors that you gather and process their data during a chat. You can do this by using the Chat Widget’s welcome screen or simply asking for confirmation during the actual chat with the bot. Below, we provide instructions on how to use the welcome screen to make your chat widget compliant, as well as a way to ask for confirmation when the actual chat is started.
Please note that the information, including data protection consents and clauses, provided in this article are general examples and should not be considered legal advice.
We offer tips and clauses to work on, but we do not know the specifics of your business and how you handle data processing or other compliance matters. It is important to consult with a legal advisor before taking any actions, including using the content of this article. You must ensure that any agreement, consent, or other legal basis aligns with your business needs based on the data you process, the purpose of processing, and the duration for which you retain it.
We explain how this feature works using the GDPR example, but you can adjust it and use it for any other legal issue you may have to be compliant with.
Implementing consent requests to your ChatBot’s Chat Widget
-
In your ChatBot Dashboard, select the bot to which you want to add the consent or information from the list.
-
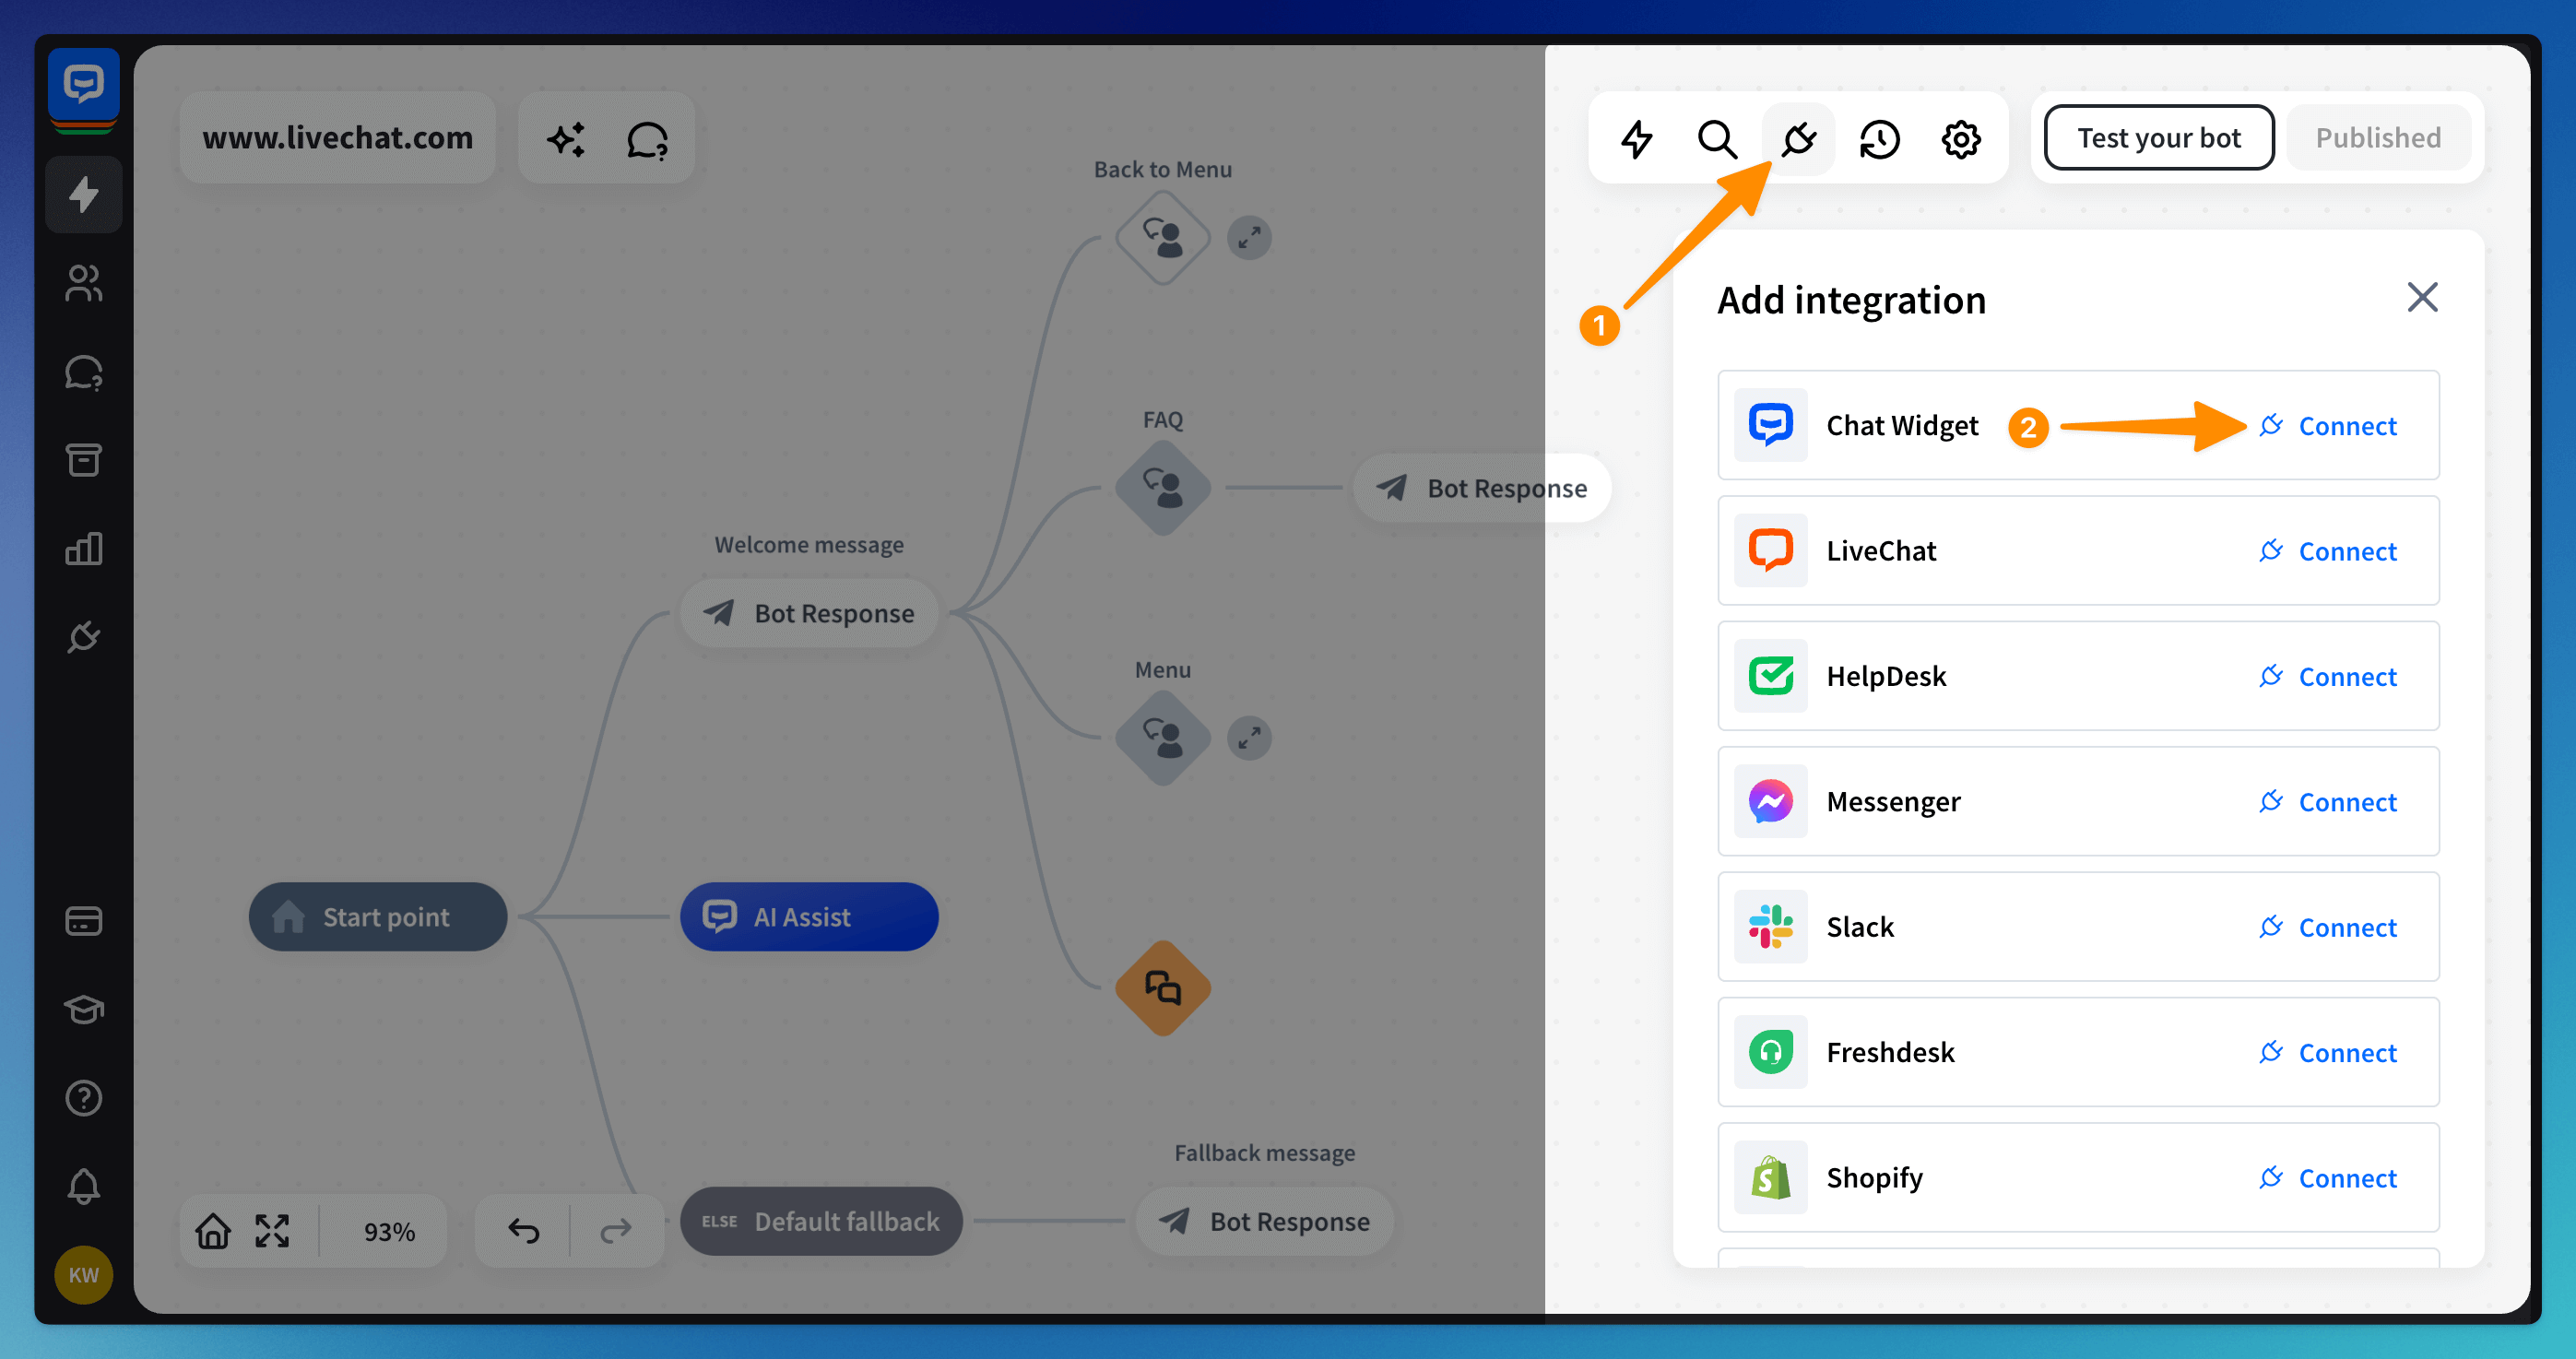
Click on the Integrations icon (1) and select the existing Chat Widget or create a new one if needed (2).
-
In the configuration screen of your Chat Widget, you will be able to fill out all the needed information to customize your Chat Widget’s look and feel. It’s also a good place to inform your customers about data processing (or other legal stuff). To do so, change the Bot Description field to something like:
By clicking “Chat with us”, you agree to our Terms of Service.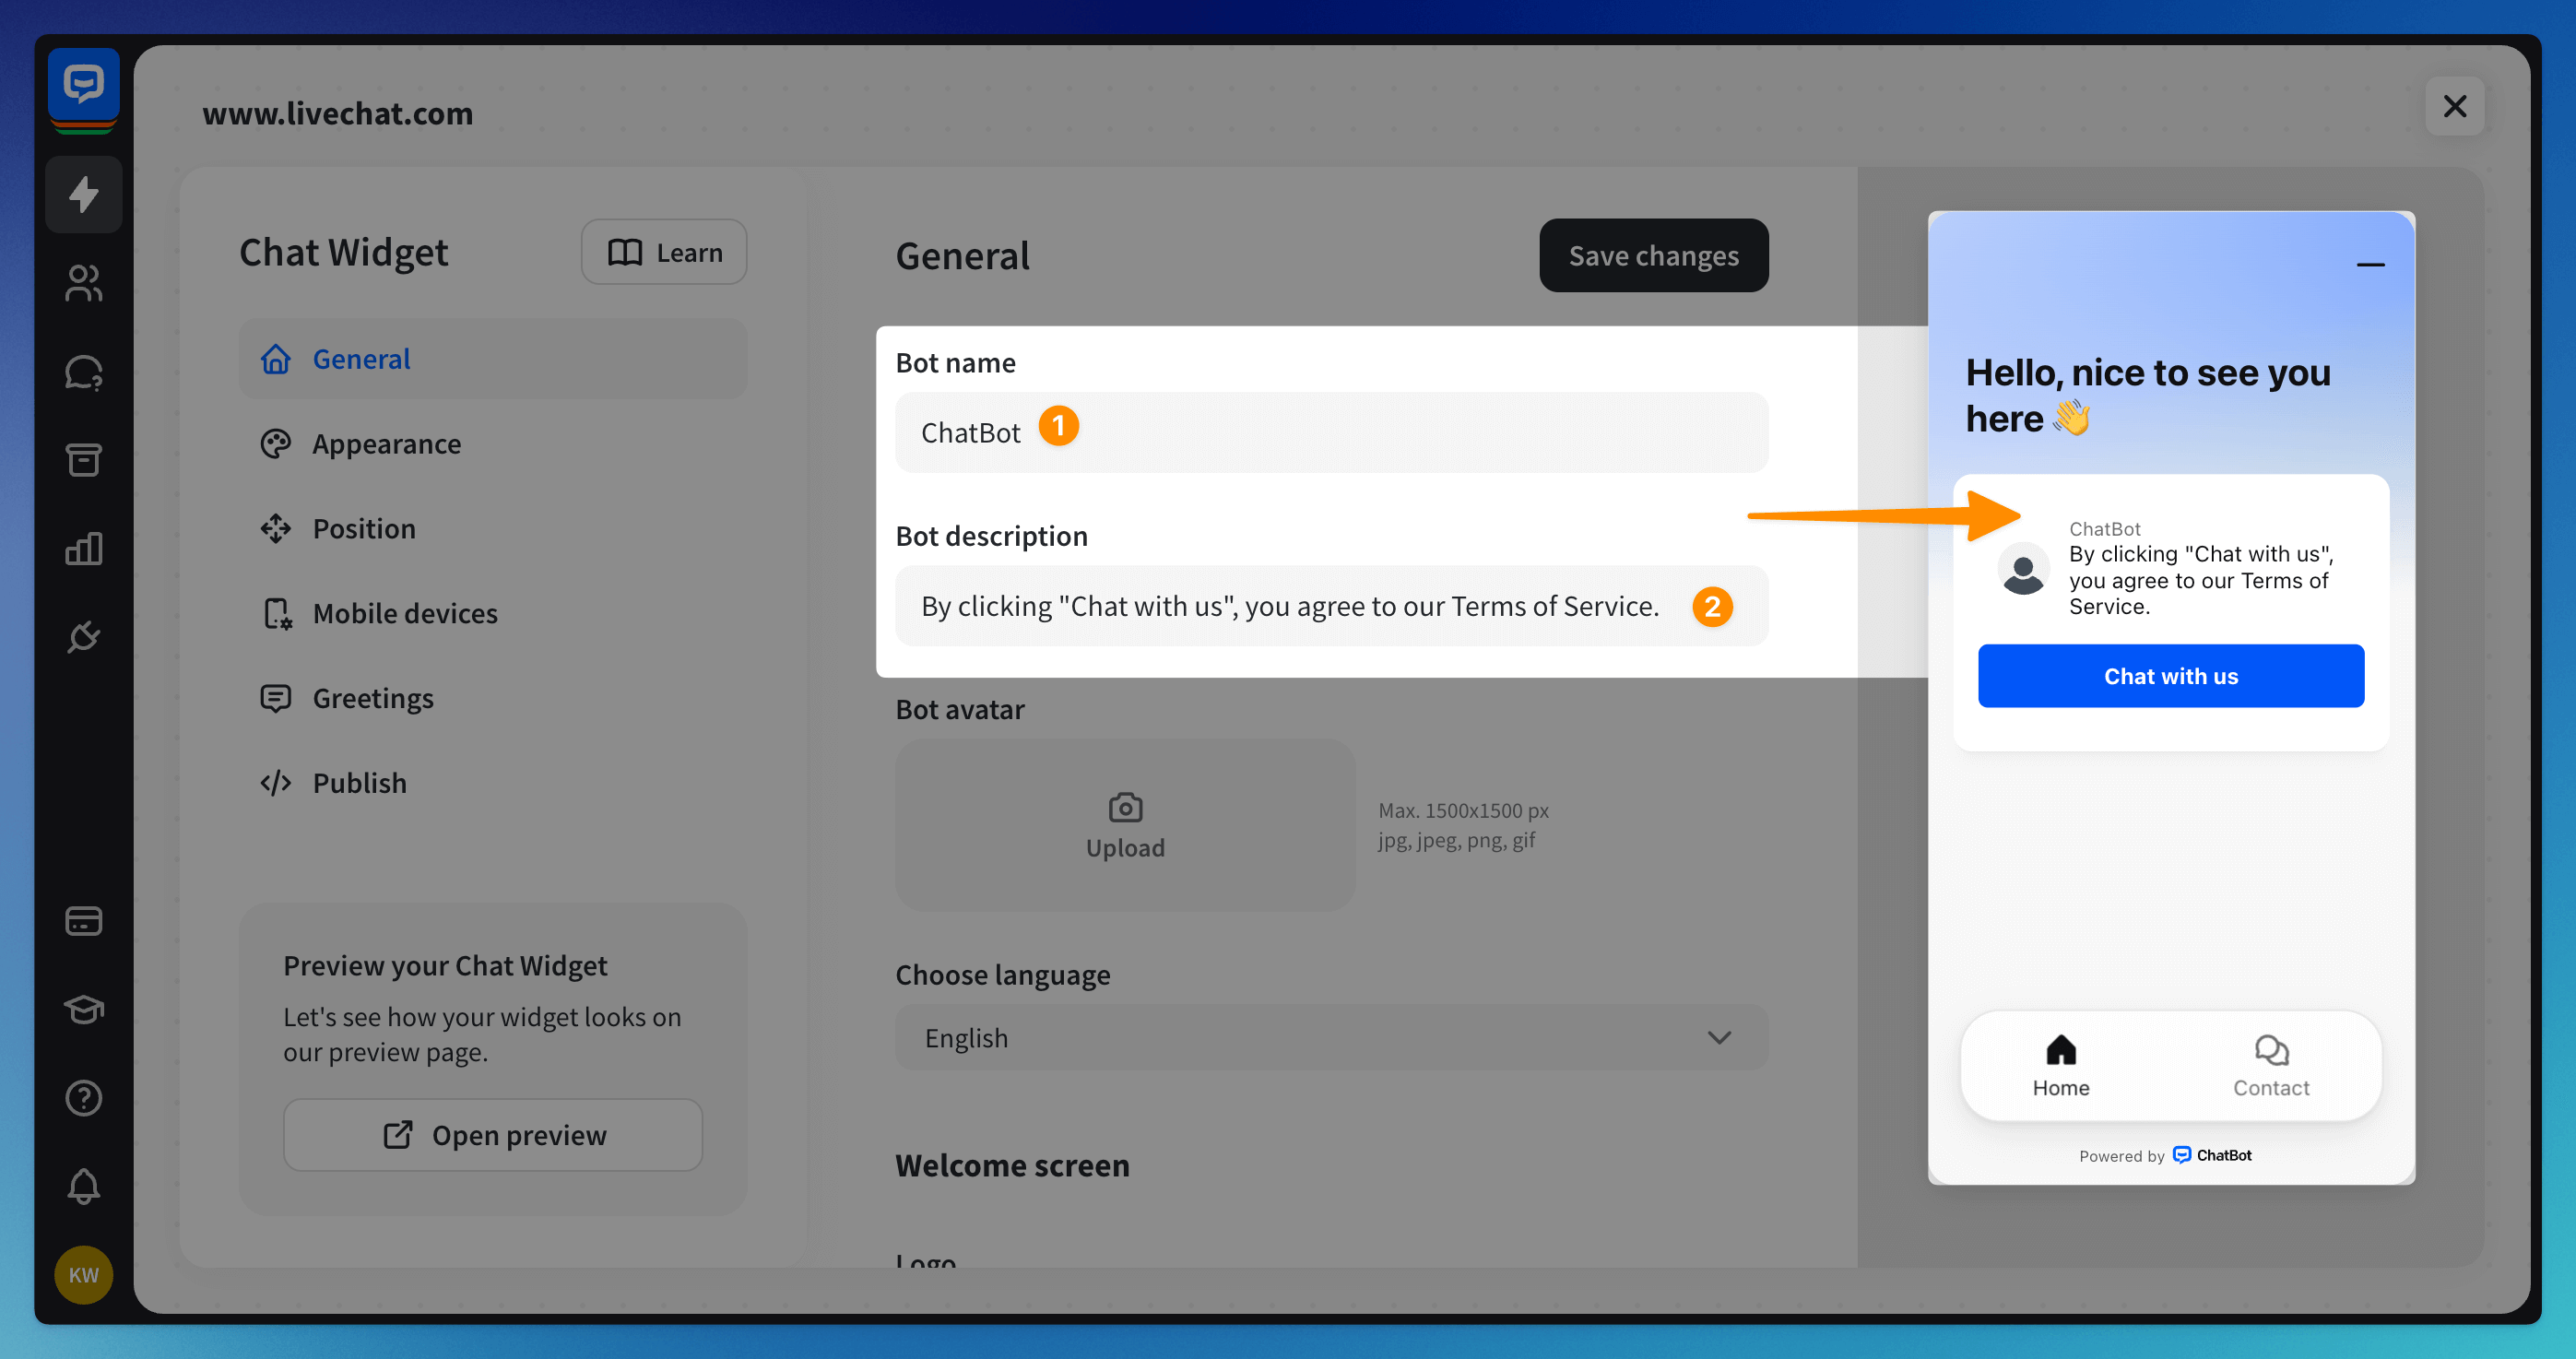
-
Additionally, you can link to your Terms of Service/Privacy Policy/Other legal document by clicking on the + Add link button and defining the link’s URL and name.
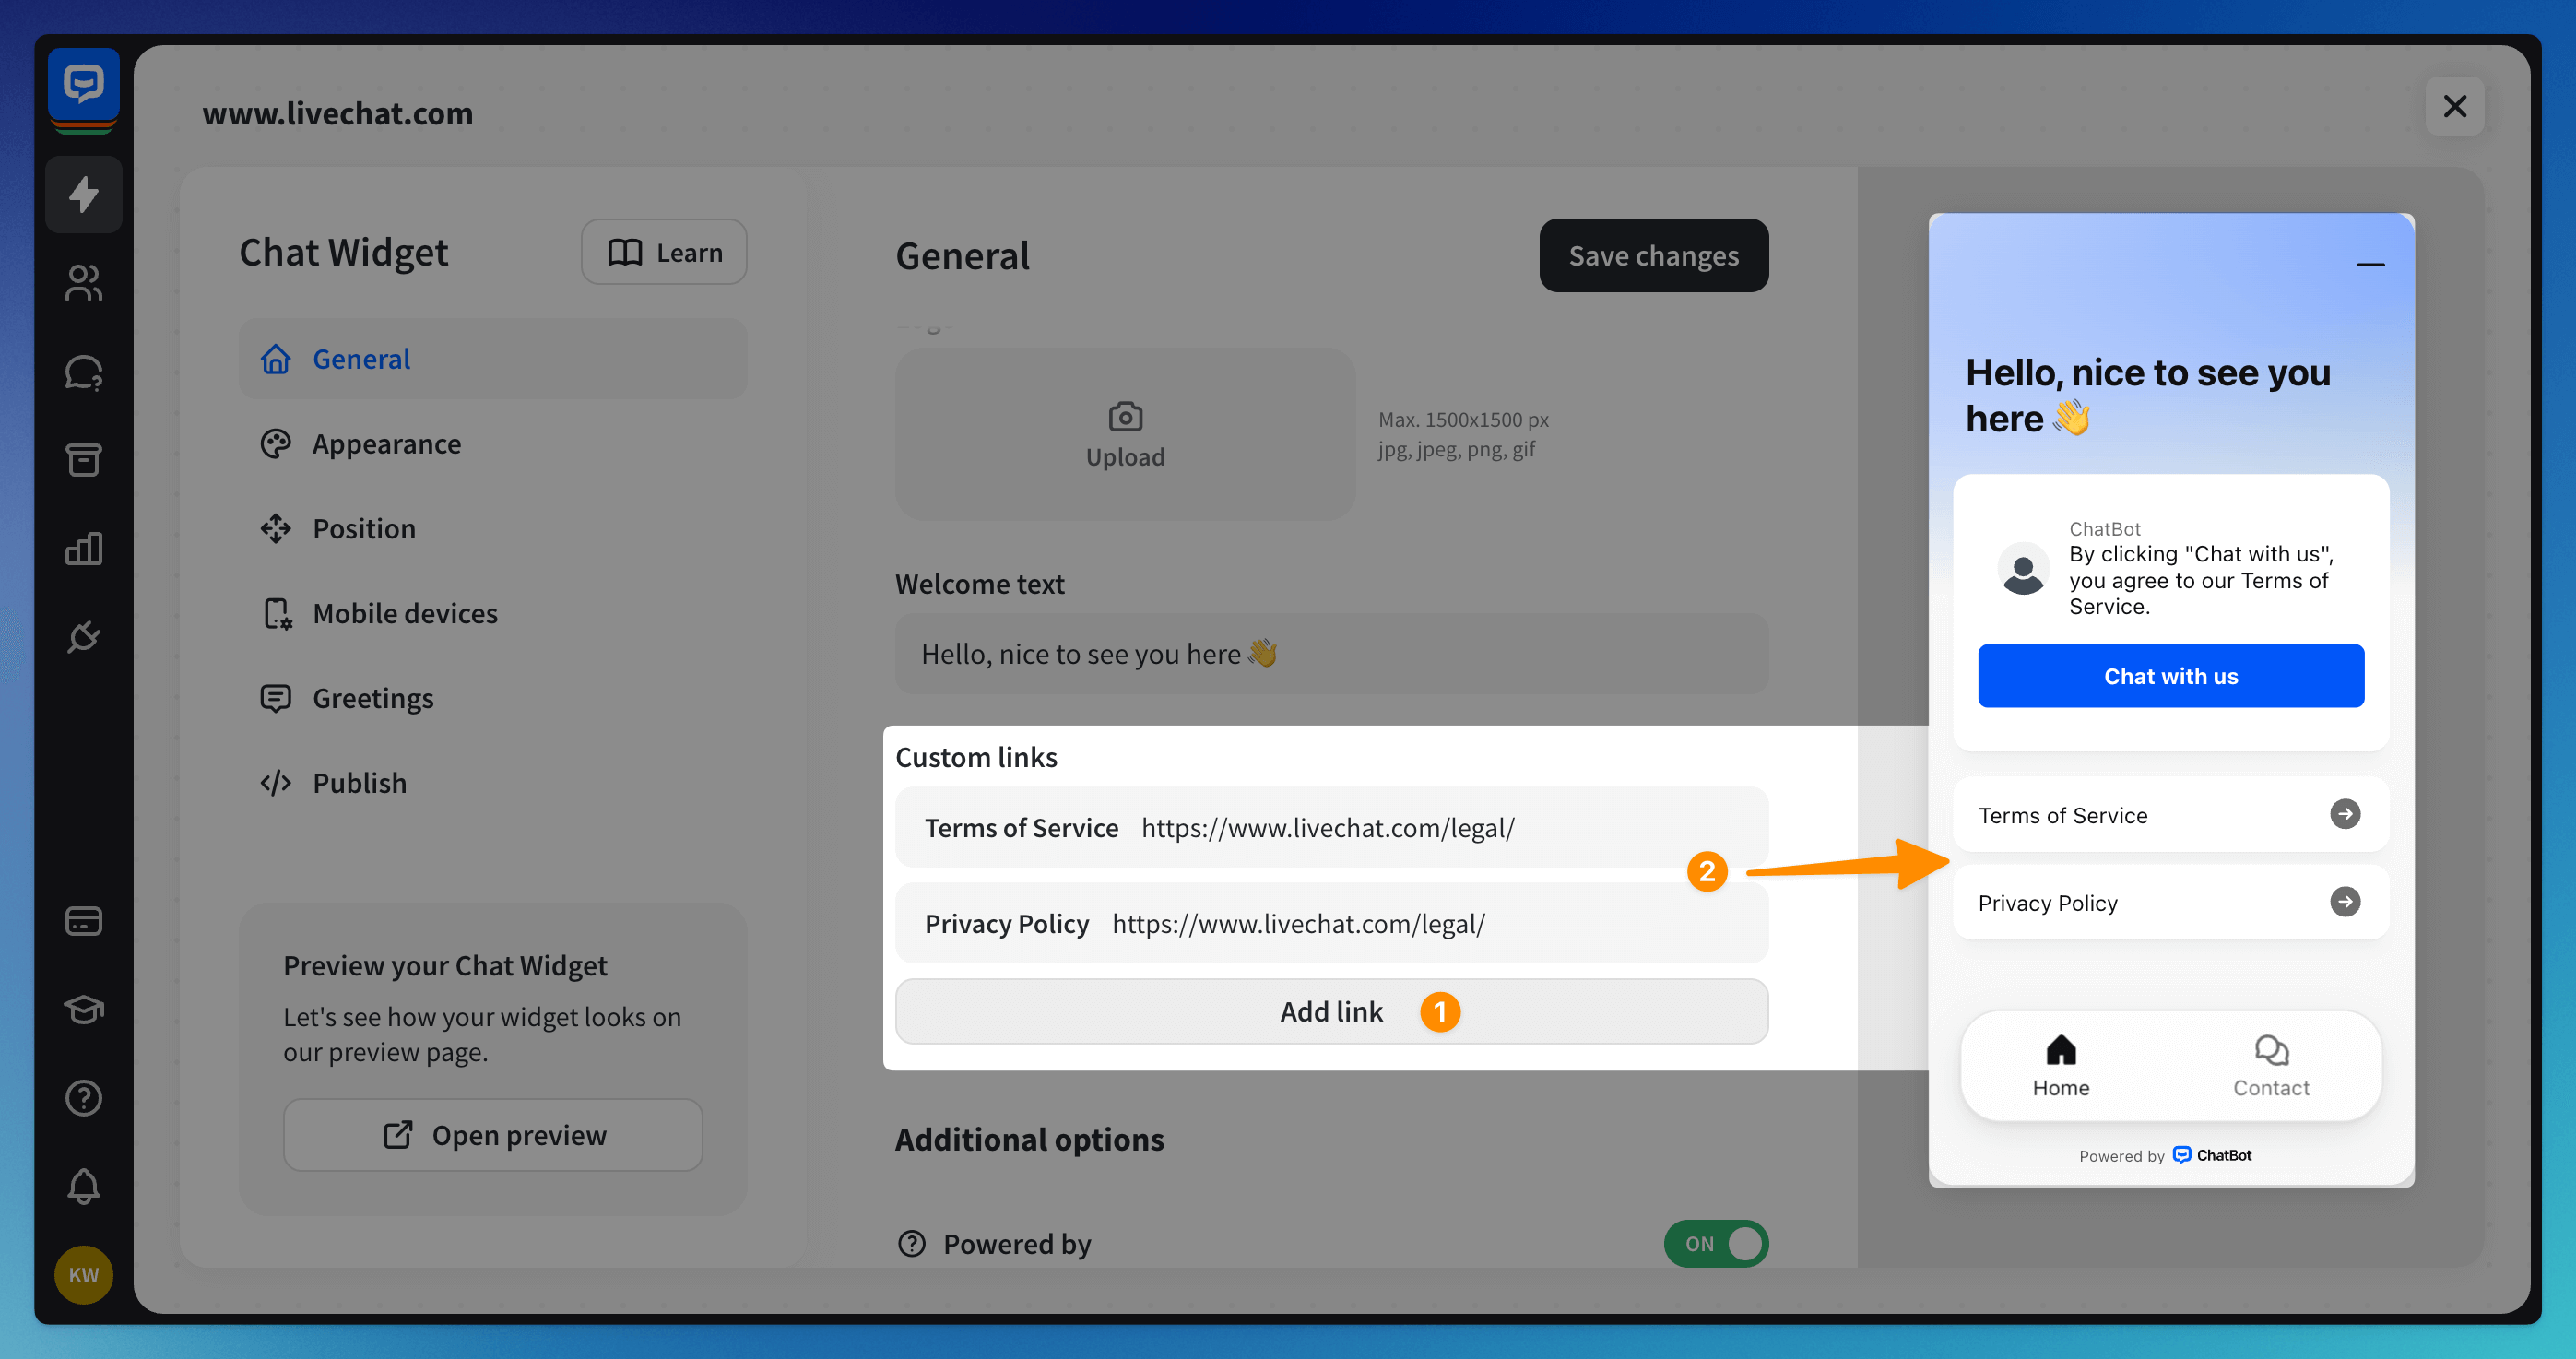 Once all is set up correctly, it should look similar to the example above.
Implementing consent to your bot flow
-
In your ChatBot Dashboard, select the bot to which you want to add - for example - the data processing consent from the list.
-
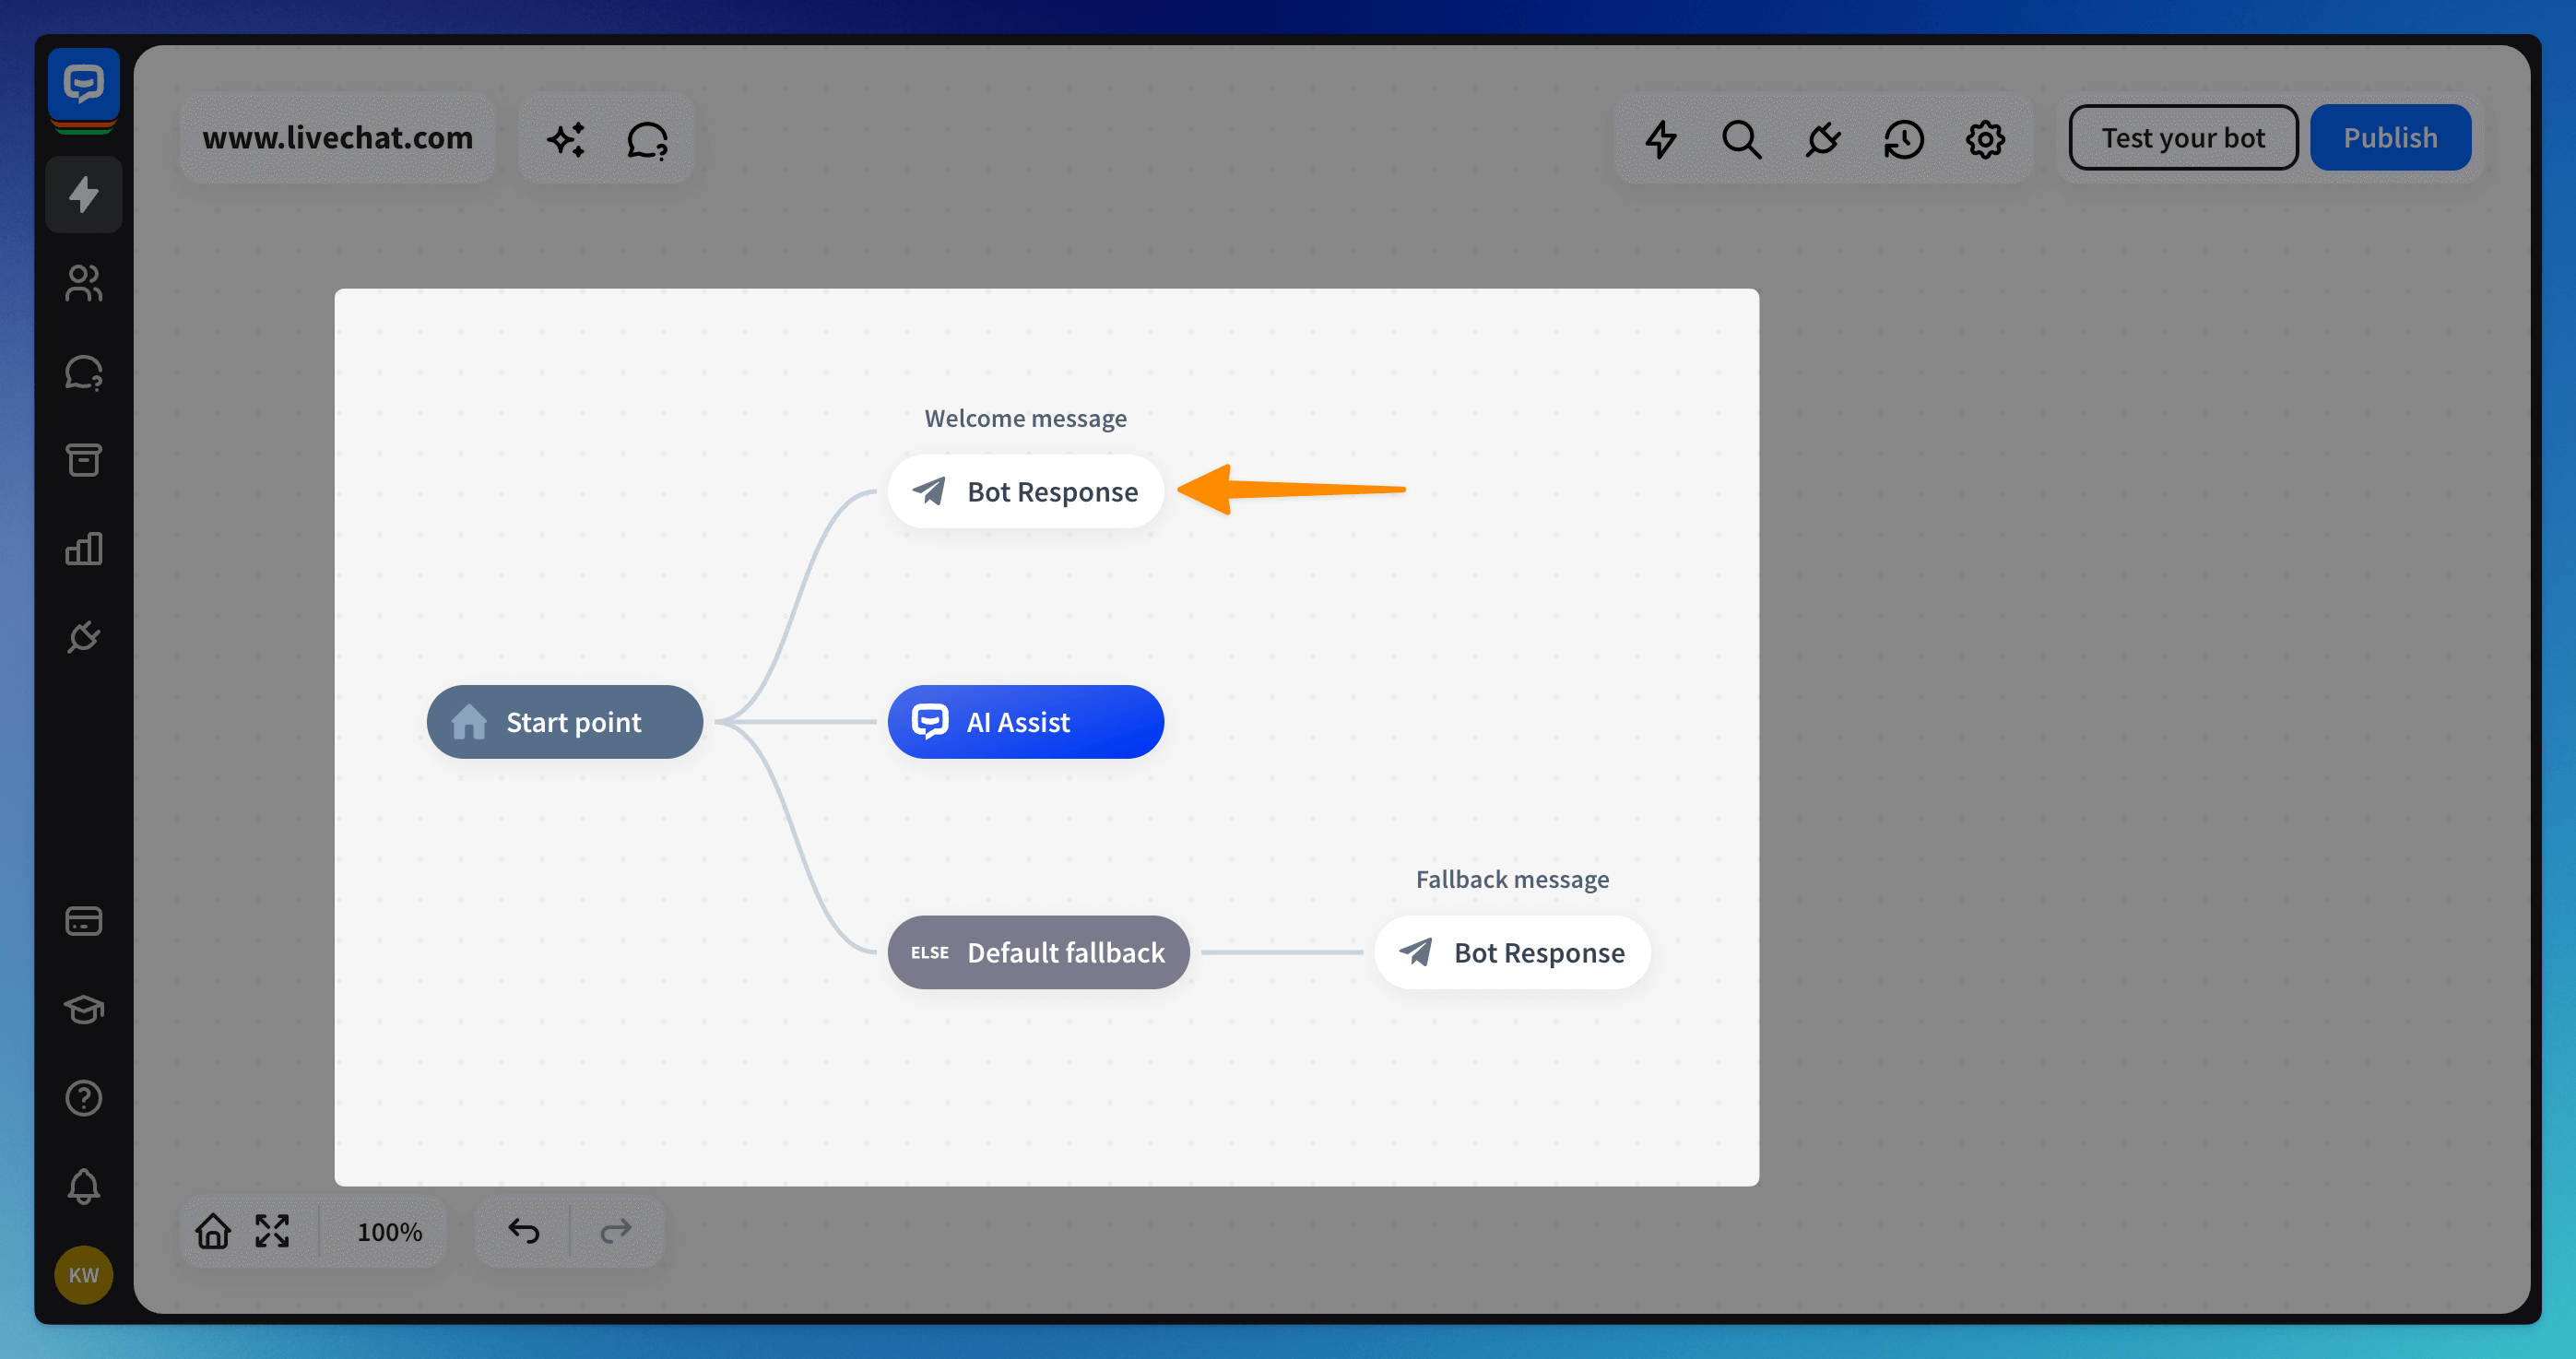
Add a new Bot response action directly after the Start point or use your existing Welcome message.
-
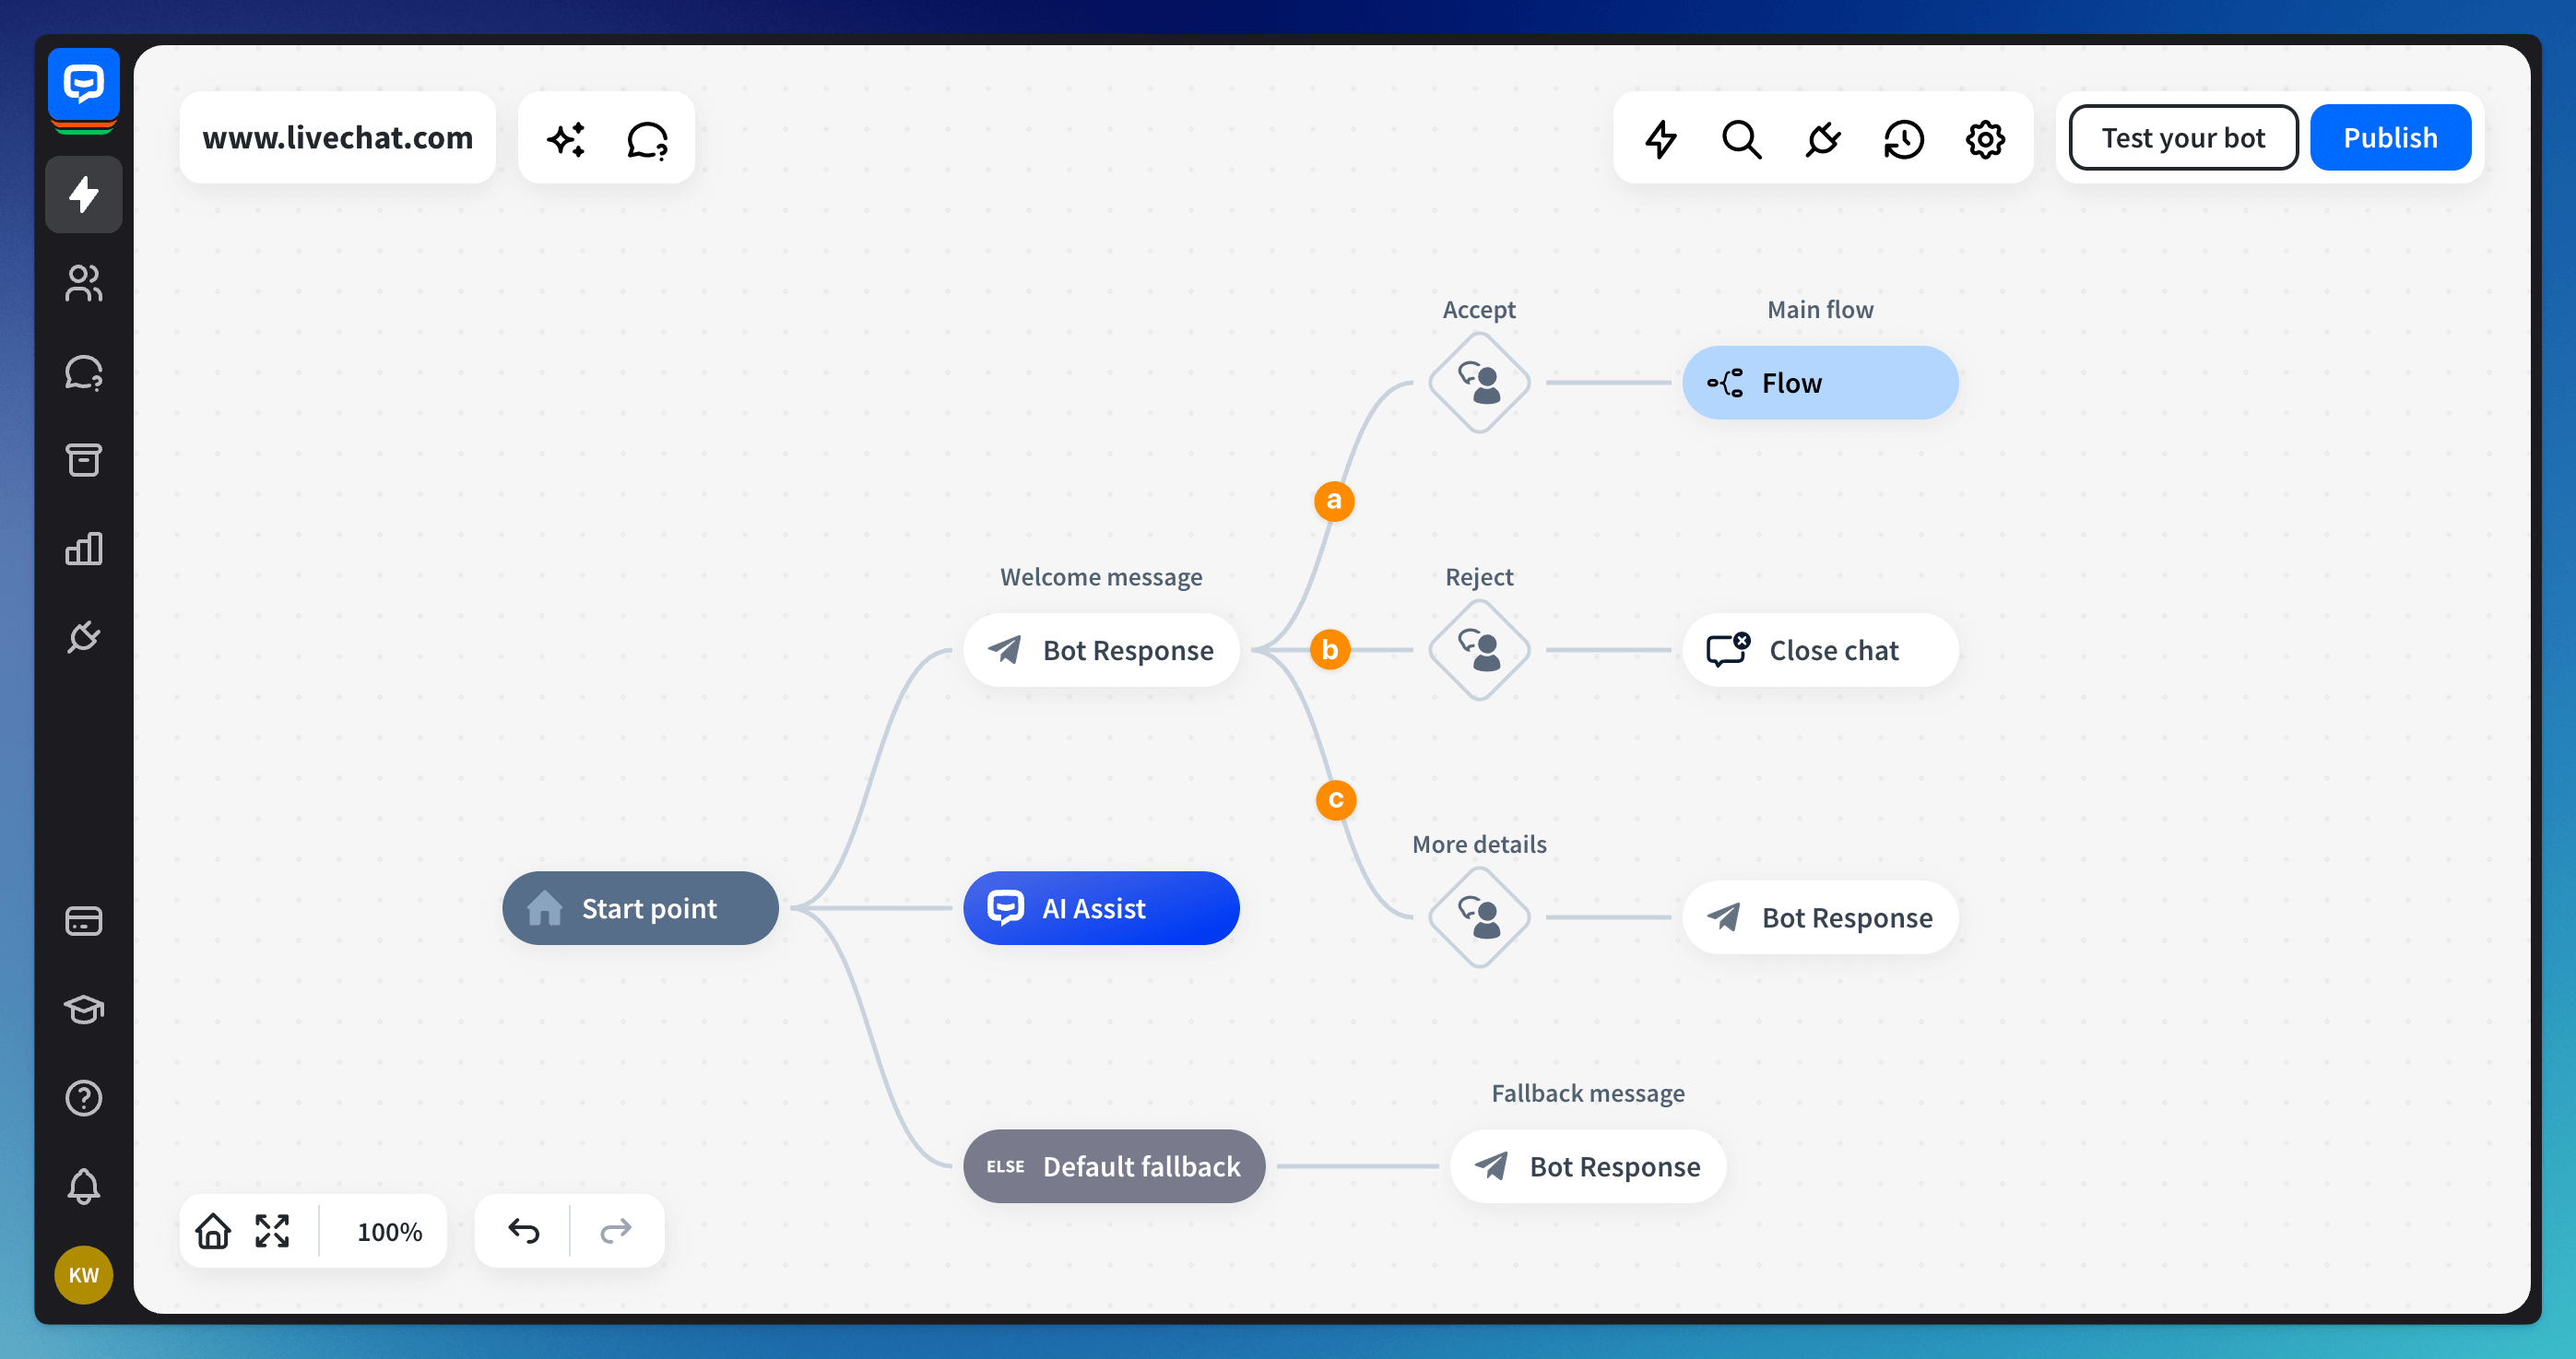
Next, add three User inputs right after that action:
-
When a user agrees to data processing
-
When a user rejects data processing
-
When a user wants to see the mentioned legal document
-
-
In the newly created Bot response, add a Quick replies message and configure it to redirect the customer to the correct branch when clicked.
Tip: You can also add a Text response at the very beginning and inform the user that they’re talking with the bot.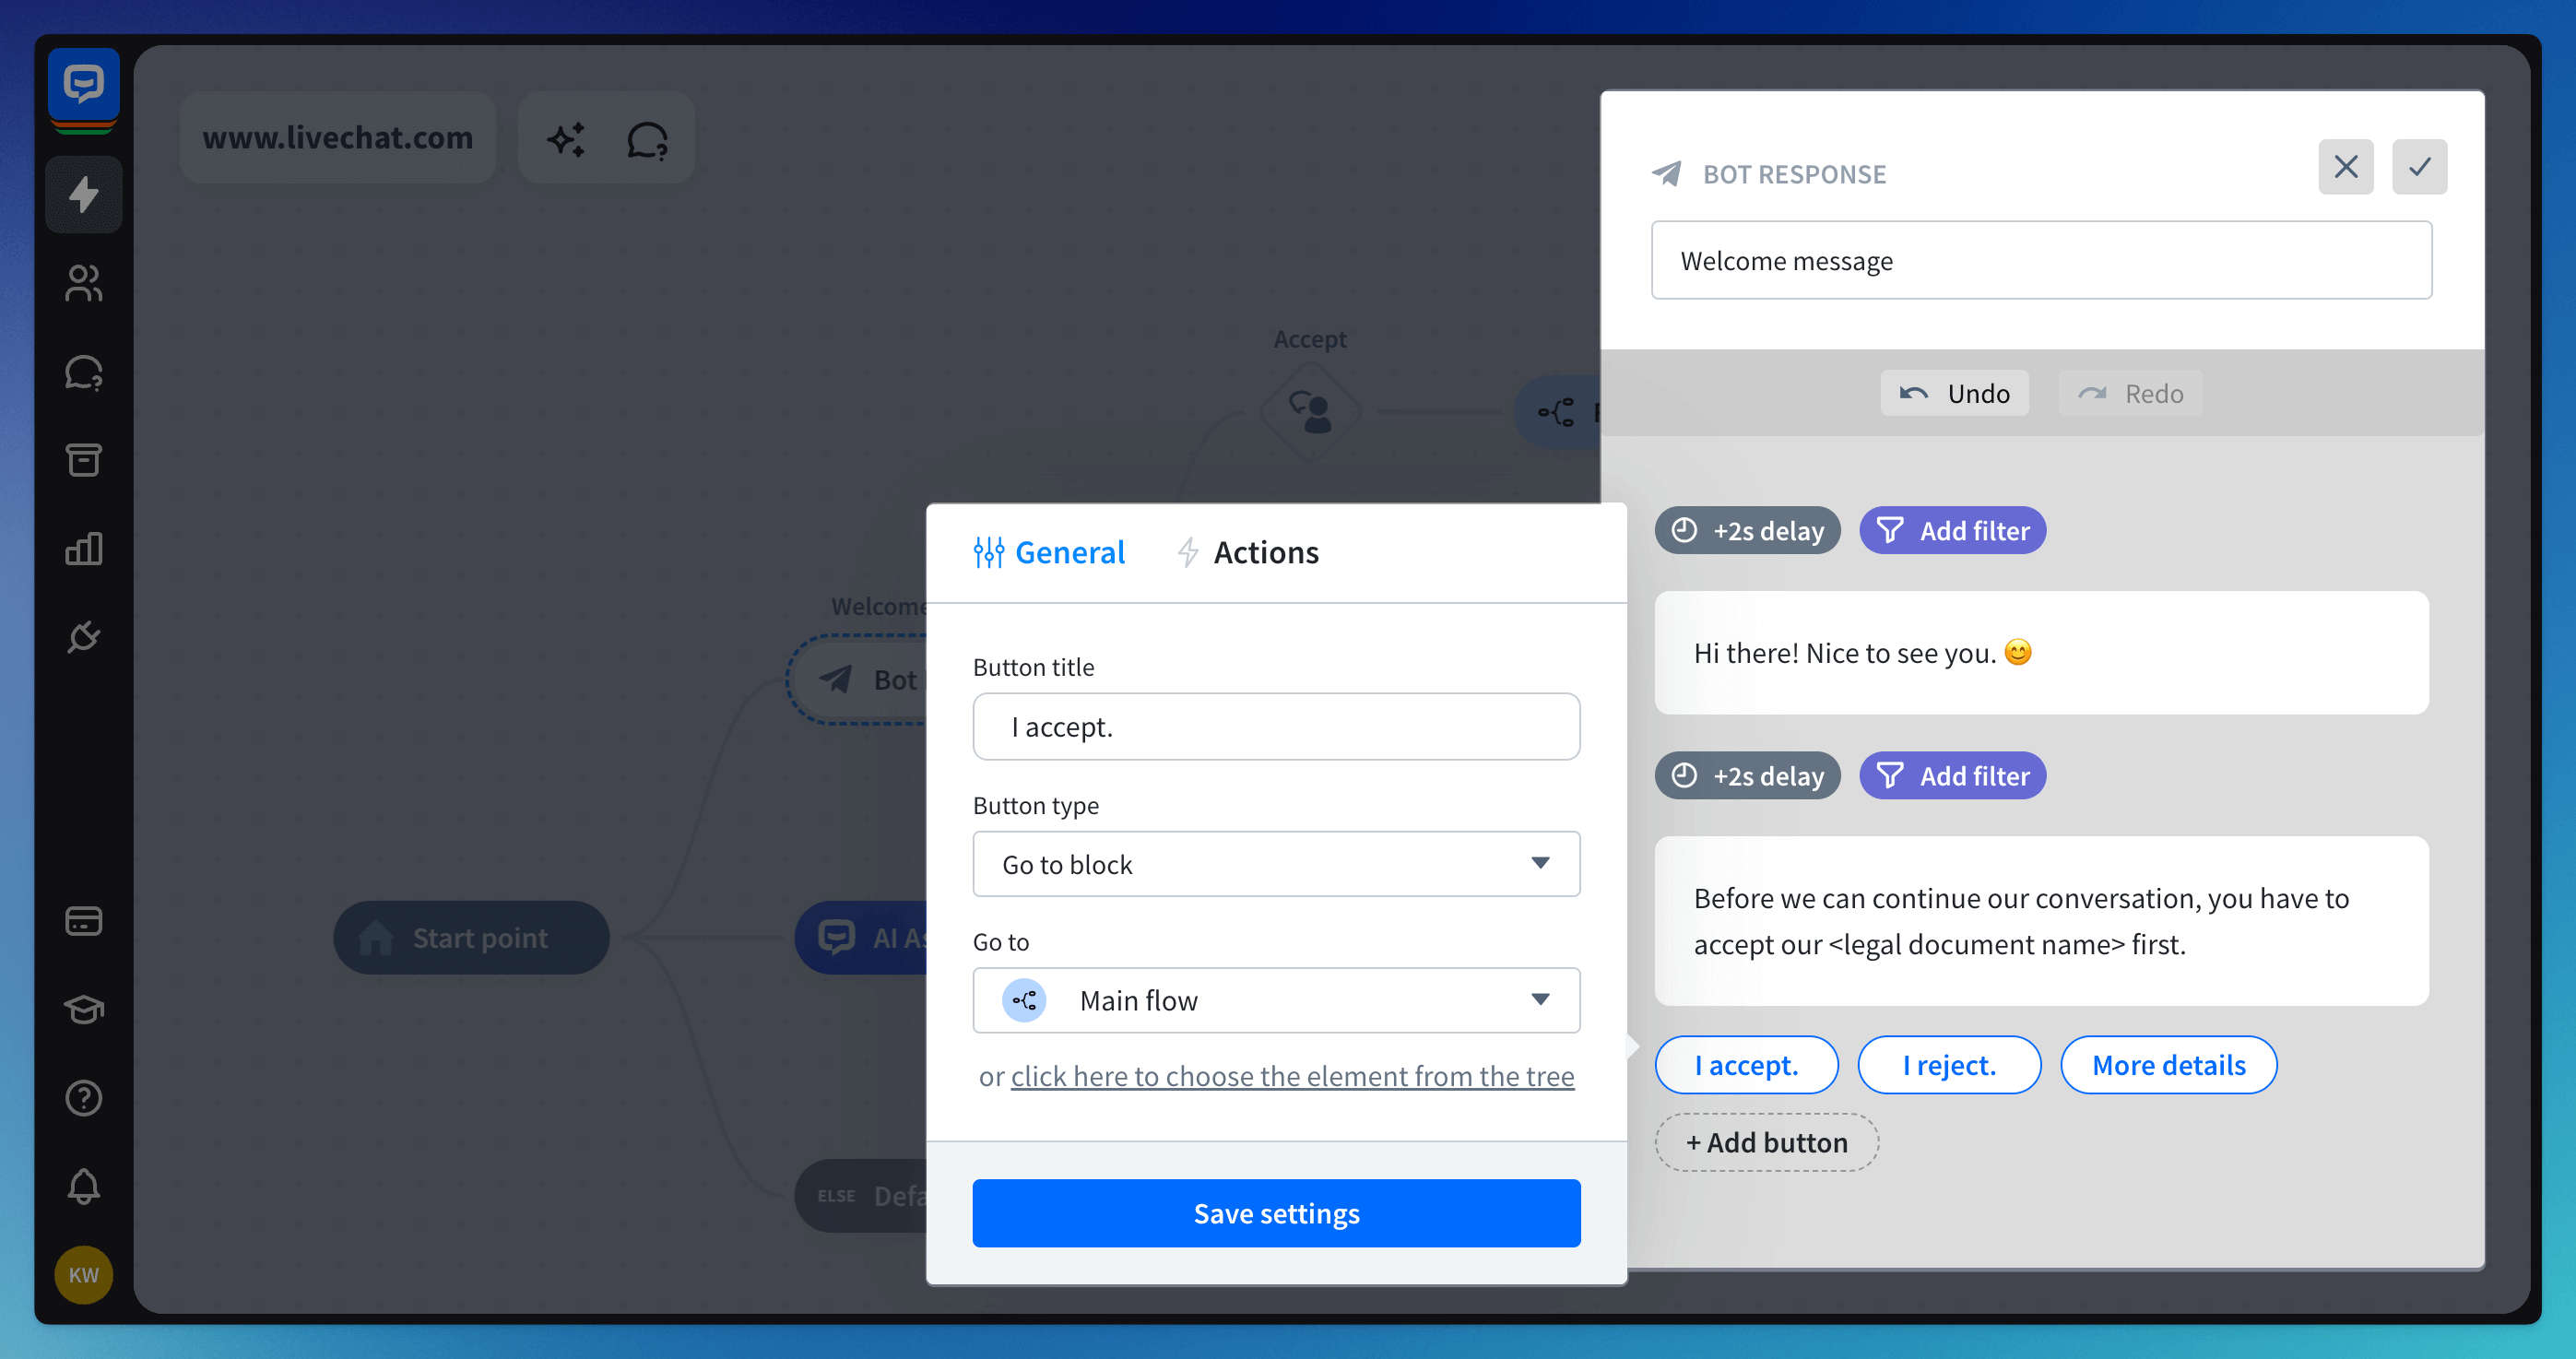
-
Add a new Bot response action to each User Input action we created and fill it with the required information:
-
When accepted, continue to regular conversation
-
When rejected, end the chat using the Close Chat action
-
When more information has to be provided, return a link to the legal document.
-
-
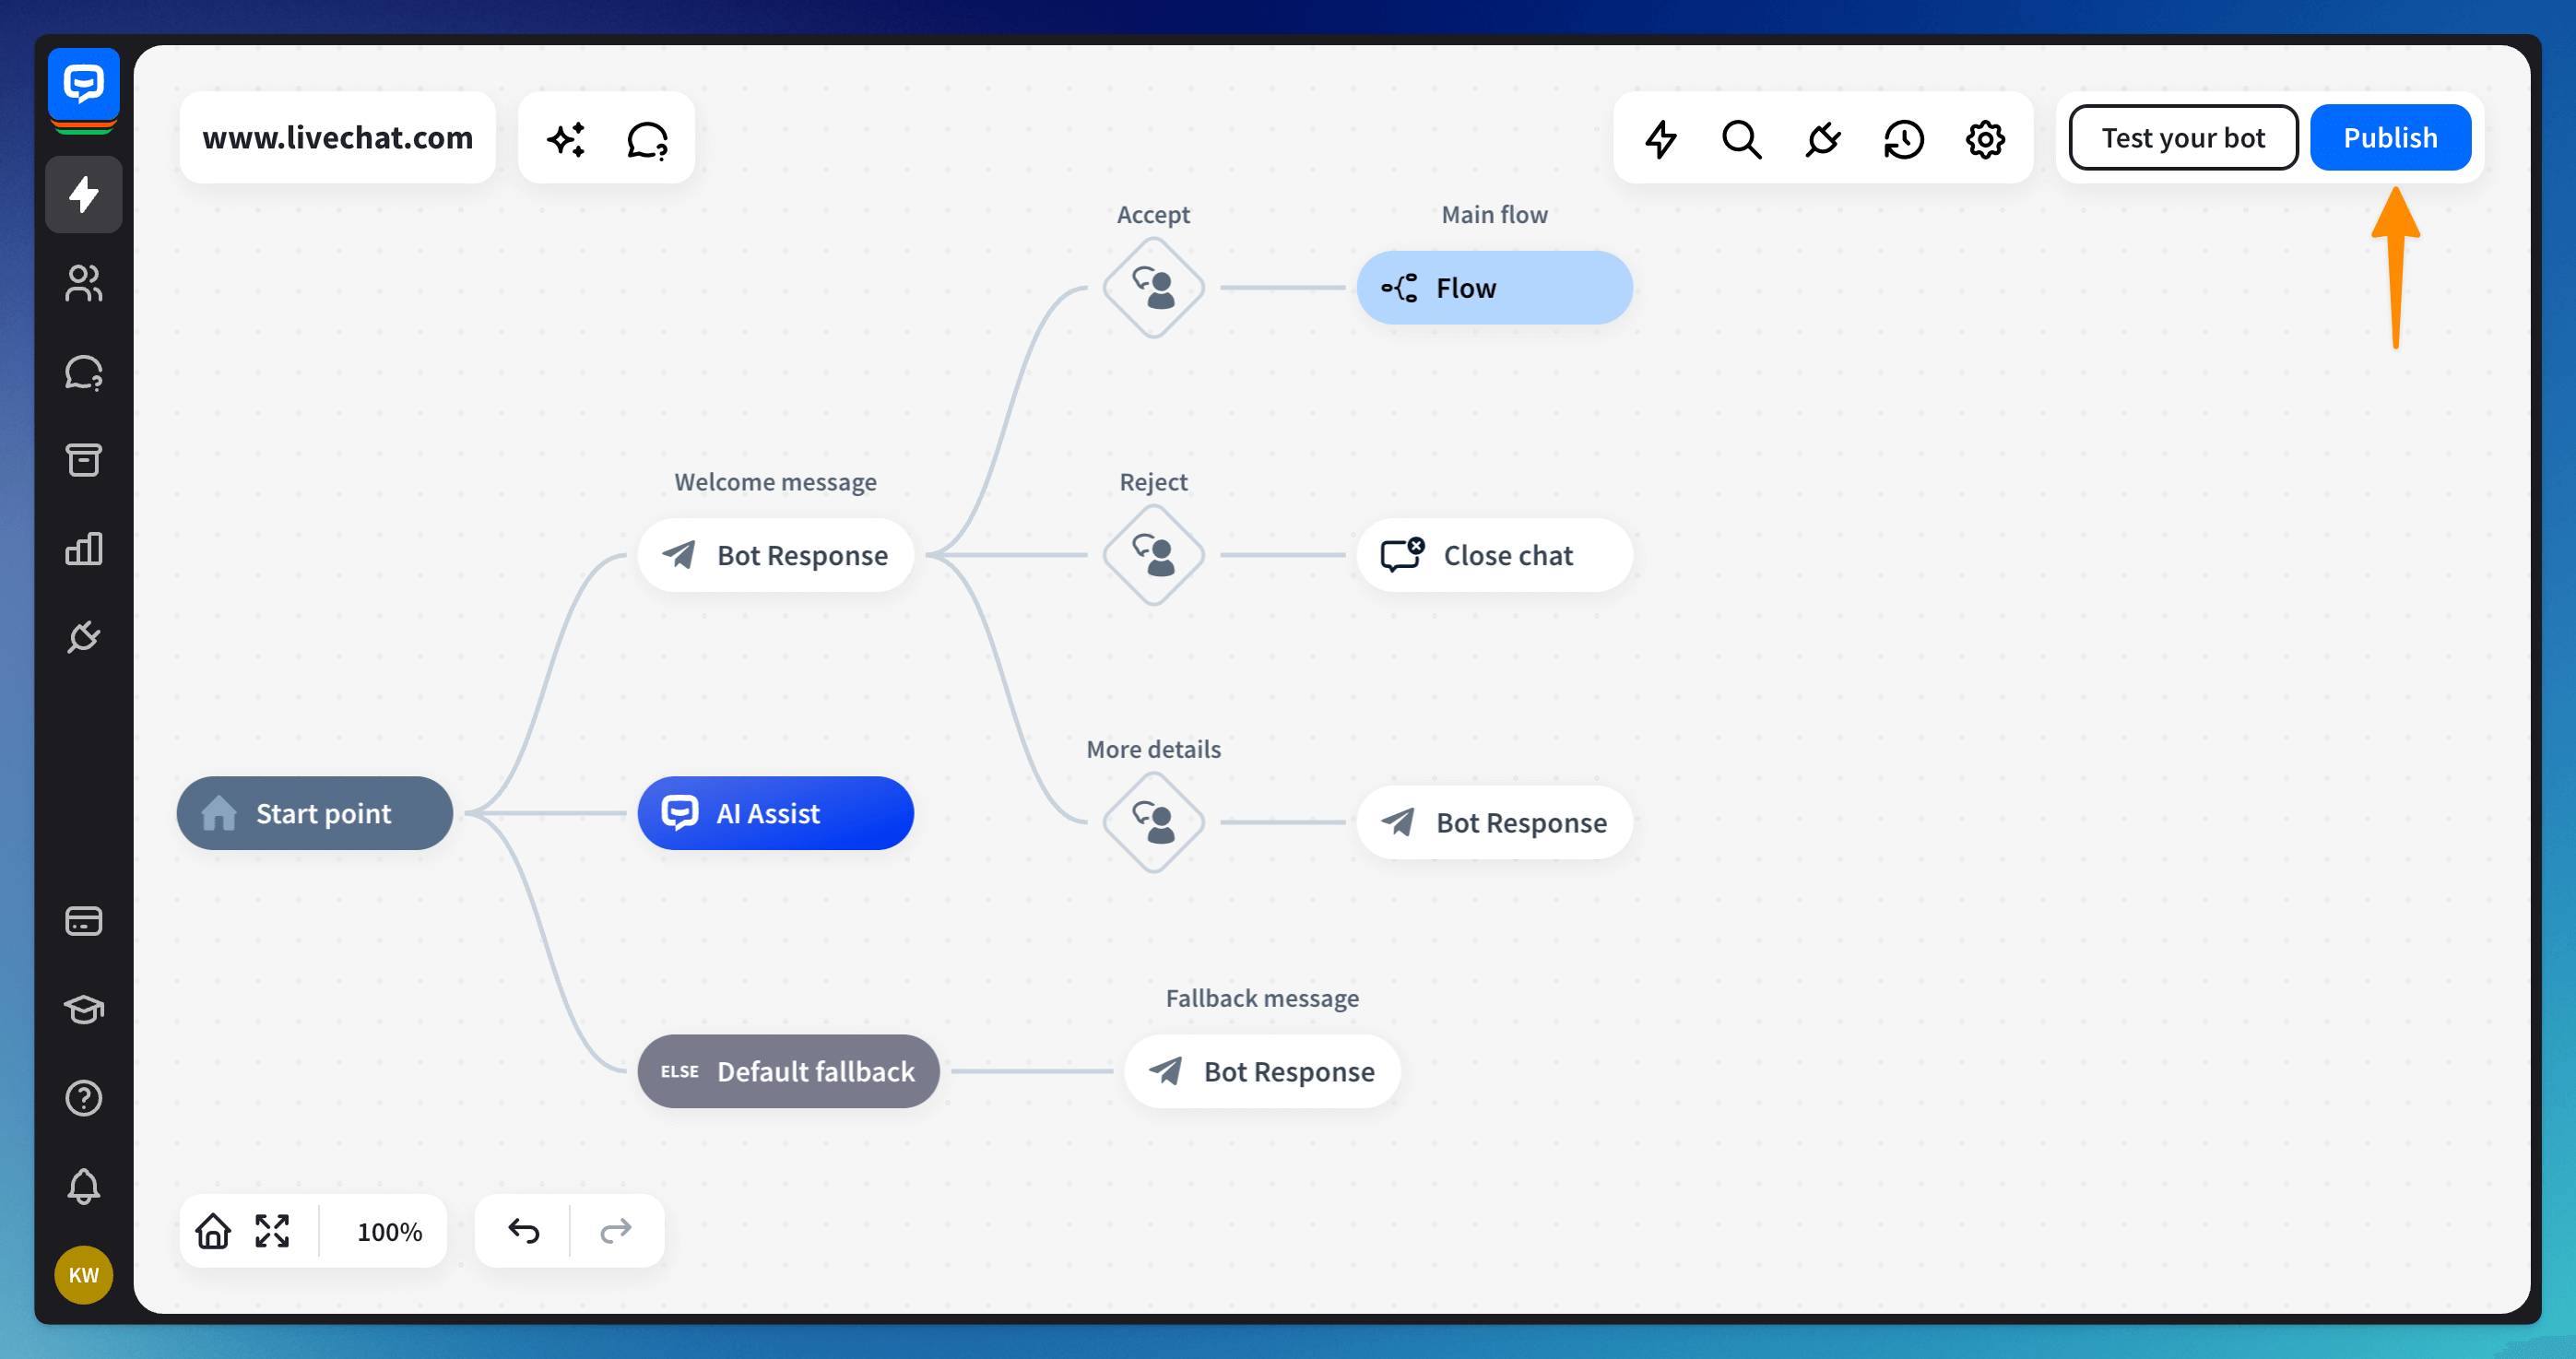
Your bot is ready! To test whether everything works, click the Test your bot button. Remember to save the changes and Publish them in the top right corner.